
Tribute to Daniele – From Illustrator to Cinema 4D
I have followed Daniele De Nigris' work for a while and have admired his work and craftsmanshift. His work on 3D patterns and colors appeal to me. Daniele is a master at using Adobe Illustrator.
Below is an example of his work from his MAGLIA II project.
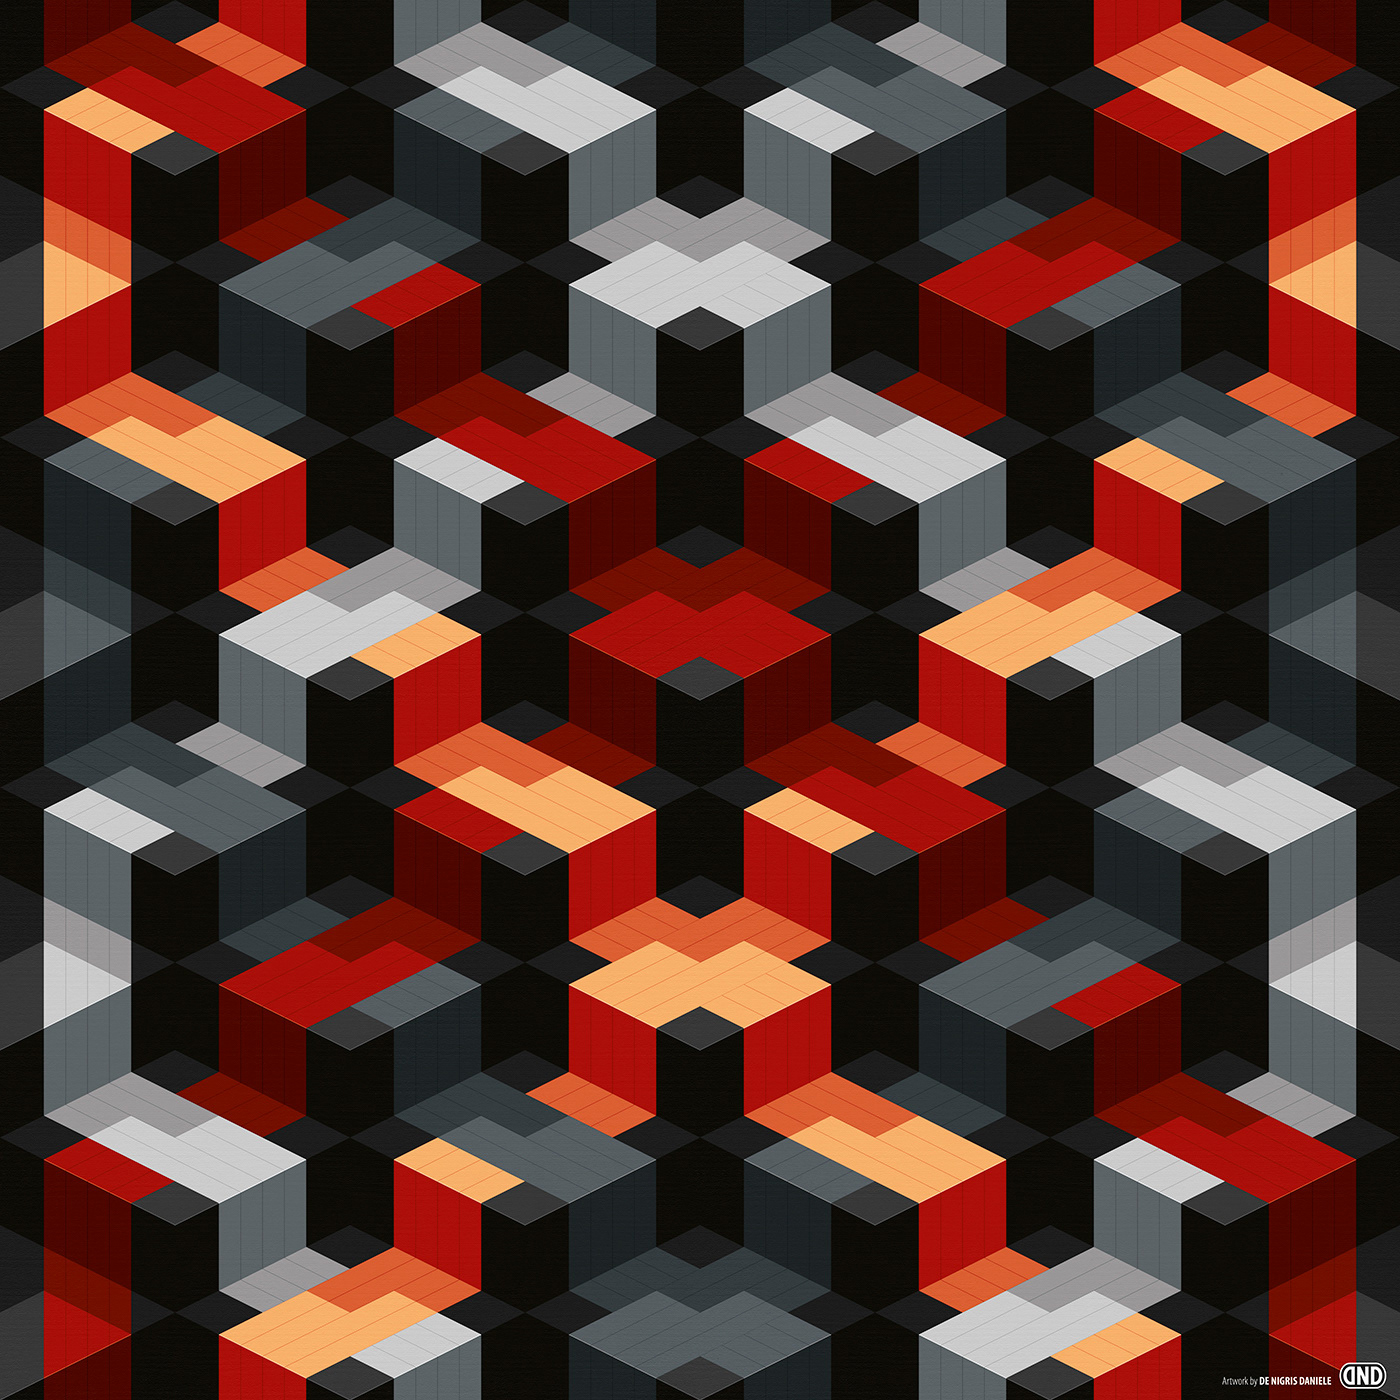
As I mentioned, Daniele works in Illustrator and on my end, I have been working with Cinema 4D. Since Daniele's work is very three dimensional in nature, I took as an exercise to try and reproduce the above piece, but using a different tool. My goal was to see how far I could get with my usual tools, Cinema 4D and Photoshop.
This was a great exercise which gave me an even greater appreciation of Daniele's work as I realized the complexity of the patterns, lighting, highlights and rhythm of his piece.
Below are both the rendering I ended up with which is close but not identical to Daniele's original, and a description of how I created that result with my tools.
Many thanks to Daniele for giving me permission to publish this project.

Differences
There are several things that are not reproduced from Daniele's piece:
- the sides in Daniele's original are richer, more complex
- the top of the dark pilars all have the same color in the original. They do not in my own rendering.
- the strokes are a thicker in my rendering
- I used ambient occlusions in my rendering which creates shadows around corners
- the texture that overlays Daniele's piece is different than in my rendering
I am sure there are multiple other differences!
Process
To reproduce a rendering close to the original piece, my final process was:
1. Finding a way to create the pattern. This involved placing basic modules in the right place with the right colors and configuration.
2. Rendering the scene. This meant finding the right textures to use, the right lighting and camera configuration.
Pattern
After multiple attempts at using the standard Cinema 4D tools, I turned to scripting to be able to replicate the pattern. So I created basic modules with the different colors and overlap style (sometimes the color that goes from top left to bottom right is on top, sometimes it is on the bottom) and then used a script to position them in the final composition.
Below is a screenshot of the Python generator that I used to generate the pattern. That script positions the module instances (essentially flattened cubes) in the 3D space and applies the desired textures (more on that below) to them.
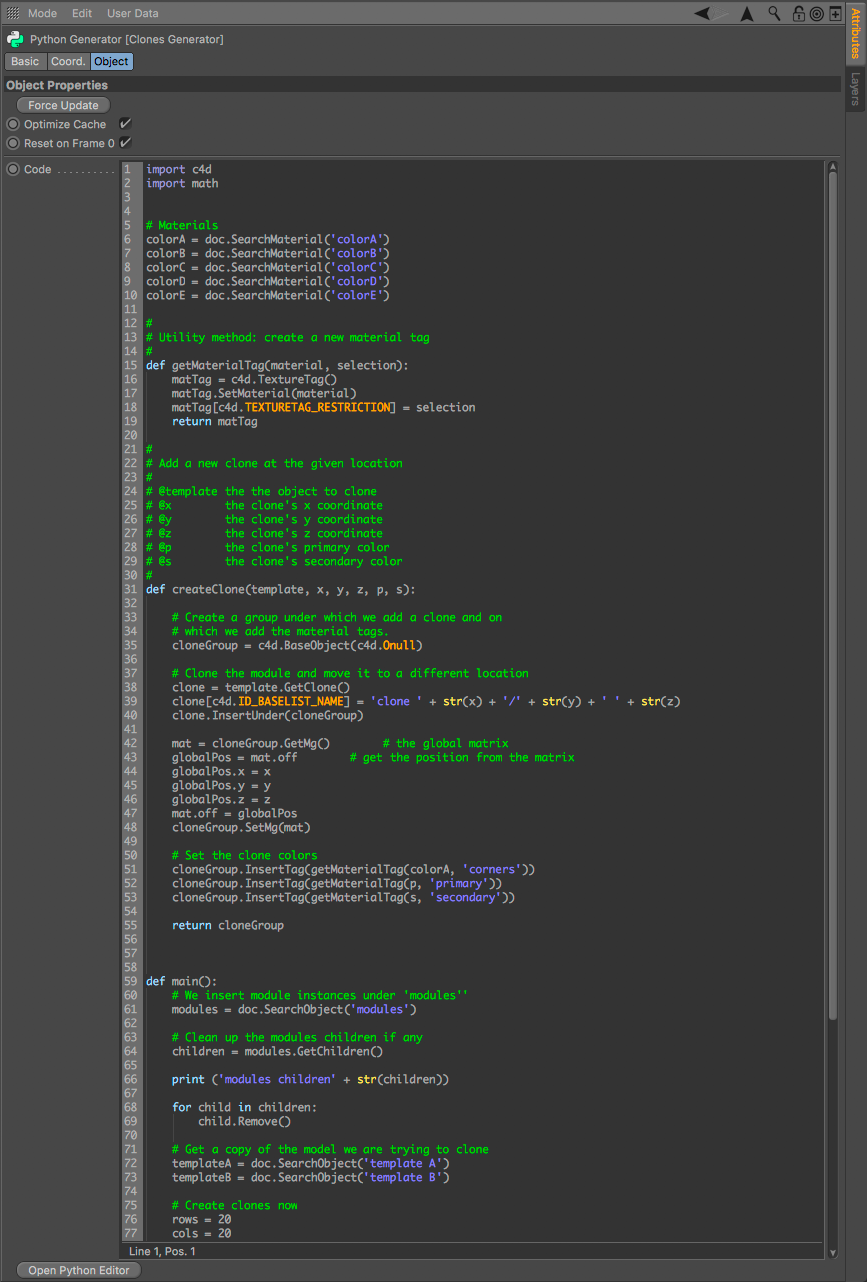
The result is that the modules are stacked in the desired pattern.

Rendering
Rendering is done with a combination of a cell shader and a sketch material.
A cell shader provides a cartoon style rendering and this tutorial is a great way to learn to use it.
The sketch material can be used to draw edges, folds, creases etc... on 3D geometry. I use sketch material in almost all my Cinema 4D projects, because combined with cell shading, they are essential to create a 2D look in a 3D project which is the type of rendering I like to create.
One of the difficulties I could not solve in this project is how multiple strokes blend in the sketch renderer. If you look at this detail of my rendering, you will notice artifacts that I could not get rid of. Notice how the white highlight is too bright at the intersection with the dark strokes. No amount of tweaking with the Cinema 4D stroke blend controls yielded the result I wanted (below, from Daniele's piece for reference).

Stroke effect is a bit off desired result

Original stroke effect on Daniele's work
Lighting
The lighting of the scene is pretty simple. There is a directional light with hard shadows which points at the scene so that the shadows project onto the modules as in the original composition.

Camera
Finally, I used a camera with a parallel projection which avoid distortion in the viewport. Below is an example of the rendering a camera with a perspective projection would create.

Learnings and conclusion
This project has been fun as there is something powerful to try and recreate a piece you admire (the Greyscale Gorilla team does that very well) as it forces you to dig deep and be creative when you either have no idea how the piece was created to begin with or you decided to use a different tool.
Now, in terms of comparing the use of Illustrator and Cinema 4D, it seems to me it depends on the flexibility you want. Illustrator gives you full control of every pixel, and that is extremely powerful. Cinema 4D gives you flexibility on the scene set up. Because it is a fully 3D tool, you could easily change the camera, the textures, the lighting or even animate the scene (e.g., see an experiment below). This can be useful depending on what you are trying to achieve.
Again, thanks Daniele for the inspiration!
Below are a few things I created using the techniques I learned in this project.


