
Laundry Thief | Making Of
The scene depicts a young thief helping himself to laundry in a gloomy alleyway, unaware of the vigilant residents about to take revenge.
Being primarily based in Architecture I don’t often design 3D characters for scenes and so this was an exciting opportunity to bring additional modelling techniques and software to an image. This ‘making of’ is therefore most suited towards architecturally driven artists with an interest in character design for their scenes.

Key Scene Details

Character Modelling
As the main focus of the image the character was the starting point of the modelling process. I began with a base model I produced some time ago which sped up the process without having to start from scratch.

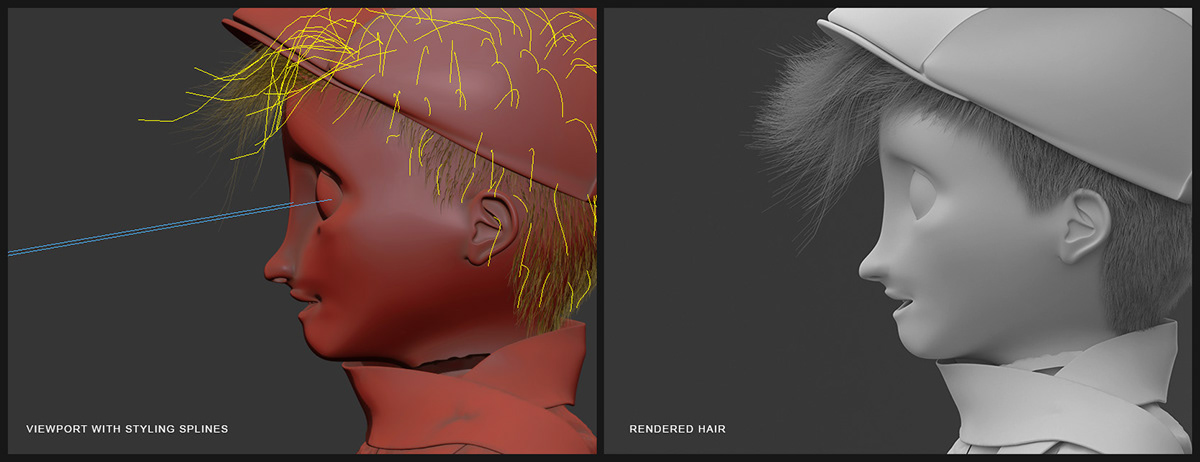
Hair Modelling
The hair was modelled using the 3DS Max Hair and Fur modifier. This is a very powerful tool and allows you to manually style hair by combing etc. There is an art to this method which I certainly haven’t mastered and so I find it easier to style the hair from a series of splines.
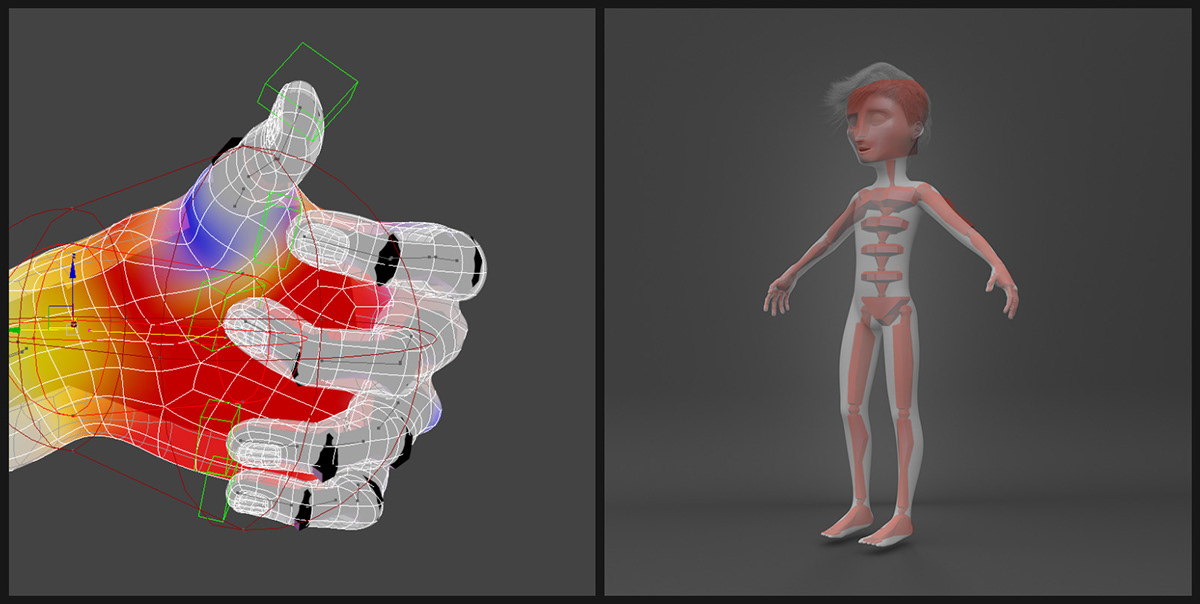
Character Rigging
The character was rigged using a 3DS Max Biped system with a Skin modifier. This gave a huge amount of flexibility to the character’s pose which was endlessly adjusted as the scene was developed.
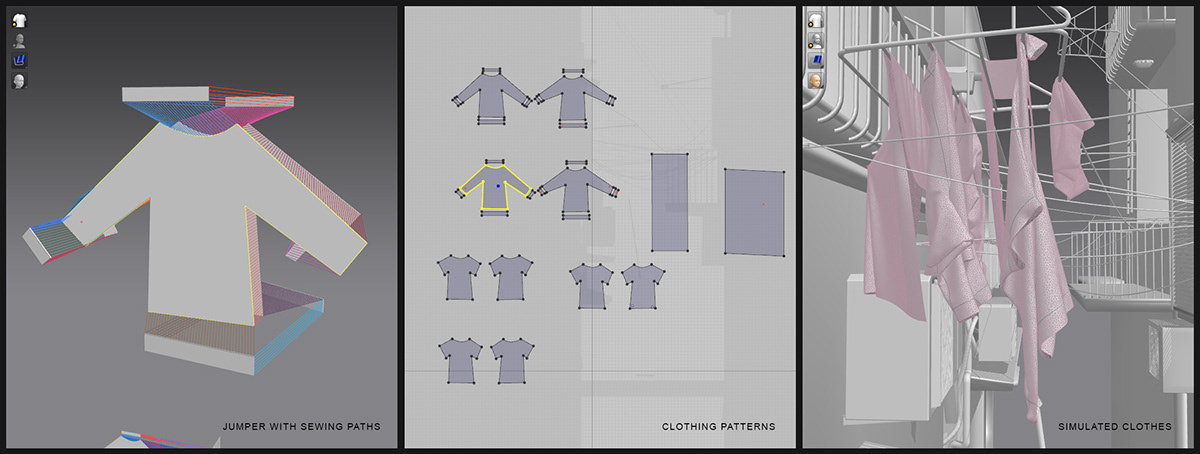
Clothing Simulation
The clothing was simulated in Marvelous Designer. MD is surprisingly easy to learn and there’s plenty of tutorials out there showing reasonable results with just a basic knowledge of the software. I imported the character base mesh in its default pose and drew the clothing pattern outlines with a little help from an online image search. After this I posed the character in 3DS Max and imported a Point Cache file into MD to simulate the clothing around the character’s final pose.

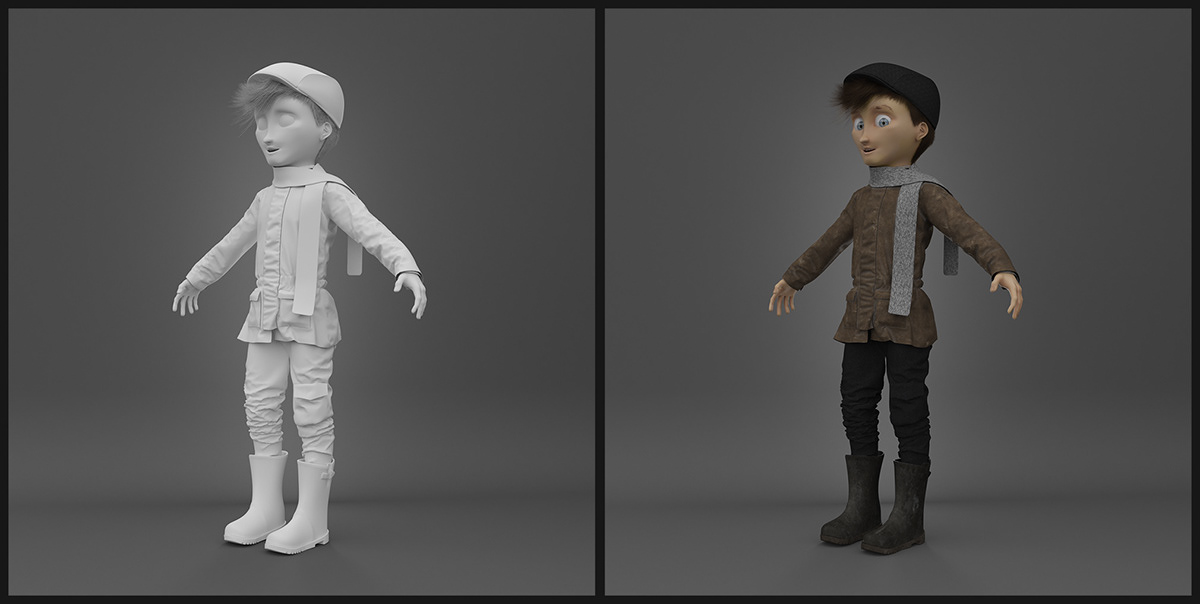
Character Skin
For the skin I used a VRayFastSSS2 material and began with the Skin (pink) preset. To add details such as the eyebrows and to give variation to the skin I rendered out an occlusion map for the character base mesh and multiplied this over a pink colour in Photoshop. I used the same map with different colour corrections to roughly match the preset RGB values for Diffuse Colour and Scatter Colour etc.

Final Character
Scene Modelling
The alleyway was mostly built from scratch with some assets taken from previous projects. The door is a 3D scan stock model which has some incredible detail though the darkness of the scene doesn't quite do it full justice.

The hanging laundry was also created in Marvelous Designer using the scene as an avatar instead of a character. I initially tried simulating all of the laundry in one file however I found it was more efficient to split garments into multiple files. The following images show the some process shots of creating the foreground laundry which the character is removing in the scene.
Scene Lighting
The scene was lit with a simple VRay Dome Light with a VRay HDRI loaded into the texture slot. I had to make a few adjustments to the sun’s position by altering the horizontal and vertical rotation but other than that the lighting setup was very simple. The grey override rendering below shows the scene’s lighting.

Brick and Graffiti
I kept all of the scene’s materials as simple as possible and where necessary used the VRayDisplacement modifier to add more realism such as to the brick and pavers. Although the graffiti is all rendered in the scene all the brickwork uses the same material. I added each graffiti type with a unique map channel ID to the brick material using a Composite map with various blending modes. For model elements which didn’t require a specific graffiti map I simply didn’t assign any UVW coordinates for that map channel. This method prevented having duplicates of the base brick material, allowing easier control of the material across the scene.

Rendering and Elements
To give a foggy/smoky atmosphere to the alley I used the V-Ray Environment Fog effect. This was kept quite subtle in the main render with the aim of boosting the fog in post-production using the Atmosphere render element. When I first started out with this effect I found myself producing fog which was way too dense and difficult to reduce without re-rendering. Instead I prefer the control of using a lower density fog and boosting the effect if necessary in post-production. I combined the atmosphere pass with a smoke texture to give the detail of smoke rather than the consistent density of the V-Ray Environment Fog.
To add more dirt and ambient occlusion to the image I set up a VRayExtraTex render element using a VRayDirt map with a black and white dirt streak texture in the Occluded slot. This was multiplied over in Photoshop which prevented the need to add the dirt to each material in the slate editor. Some key render elements are displayed below.
To add more dirt and ambient occlusion to the image I set up a VRayExtraTex render element using a VRayDirt map with a black and white dirt streak texture in the Occluded slot. This was multiplied over in Photoshop which prevented the need to add the dirt to each material in the slate editor. Some key render elements are displayed below.
It’s also worth noting that I rendered the scene with Depth of Field controlled by the Physical Camera. The effect is fairly subtle but I prefer to have it active rather than rendering with full sharpness across the image’s depth.

Post Production
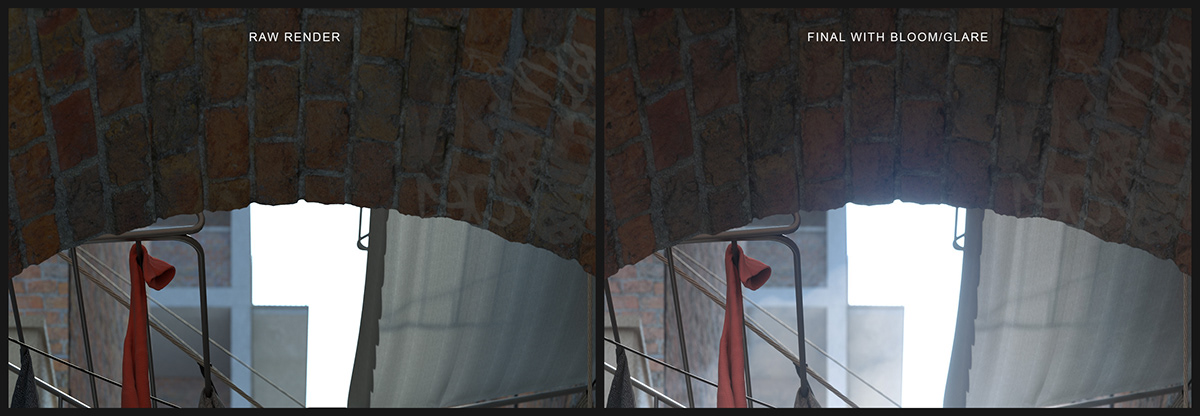
I saved out each pass as a 32-bit EXR to retain as much pixel information as possible. This was particularly important for the overexposed areas of the image. It can be tricky working with a scene which has both very bright and very dark areas and a real world camera in this context would almost definitely pick up glare from the sky. I used ArionFX to add this bloom and glare alongside vignetting and tonemapping. Following this I used Magic Bullet to make a few minor colour and curve adjustments before adding the additional smoke and fog.
End


