

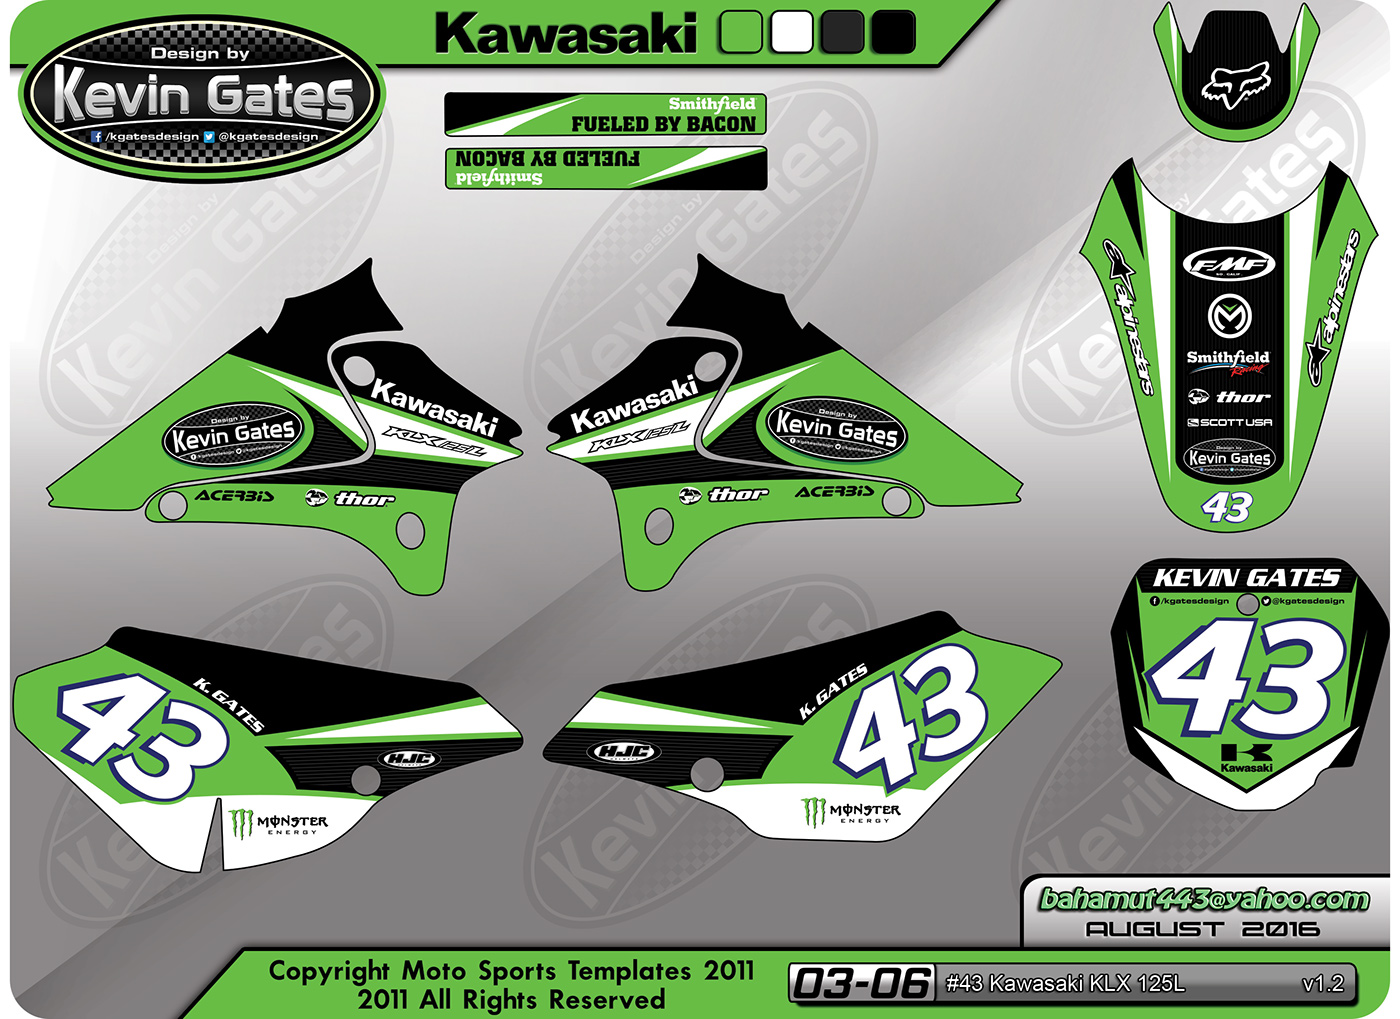
The idea here was to design and apply a completely custom wrap for my dirt bike. I own a 2006 Kawasaki KLX 125L. The completed vector graphics above utilize the Kawasaki template commercially available from Moto Sports Templates. The graphics were printed on 6mil vinyl with 15mil laminate and supplied by fammx.com. Since this is my first project with a motorcycle, it will give me a better understanding of the printing and application process. It was also allow me to market myself to local MX or ATV riders in search of custom graphics.

Here's a look at the bike before applying the new custom graphics. I'm pictured here with my beautiful 3 year old daughter, Natalie. She loves to ride!

My daughter helps me break down the bike by removing the plastic panels. I love this kid!

With the plastic panels removed, they are then washed and polished to remove scratches. This will help the new vinyl better adhere to the plastics.

With the MX plastics fully cleaned and polished, the vinyl decals are cut and trimmed into separate panels.
Each vinyl decal is removed from its backing and applied with a vinyl application solution consisting of 1:1 ratio of rubbing alcohol and water. This helps allow the decal to be re-positioned on each panel when applying. The solution is pushed out from under the vinyl with a squeegee; then properly fit to each panel. To help the material wrap around tough edges and curves, a heat gun (or hairdrier) is used. This will dramatically soften the vinyl. This application process takes at least 2-3 hours. Patience is key to having properly positioned panels without bubbling.

The panels are put aside to dry. I let them sit for a day or so.
Since I chose not to remove the tank from the bike, I then re-attached the completed shroud panels to the bike. This helps to guide me as I line up the tank panels for a perfect fit. Since the top of the vinyl decals are meant to wrap around the tank, the seat is put to the side and installed once the graphics on each side properly dry.

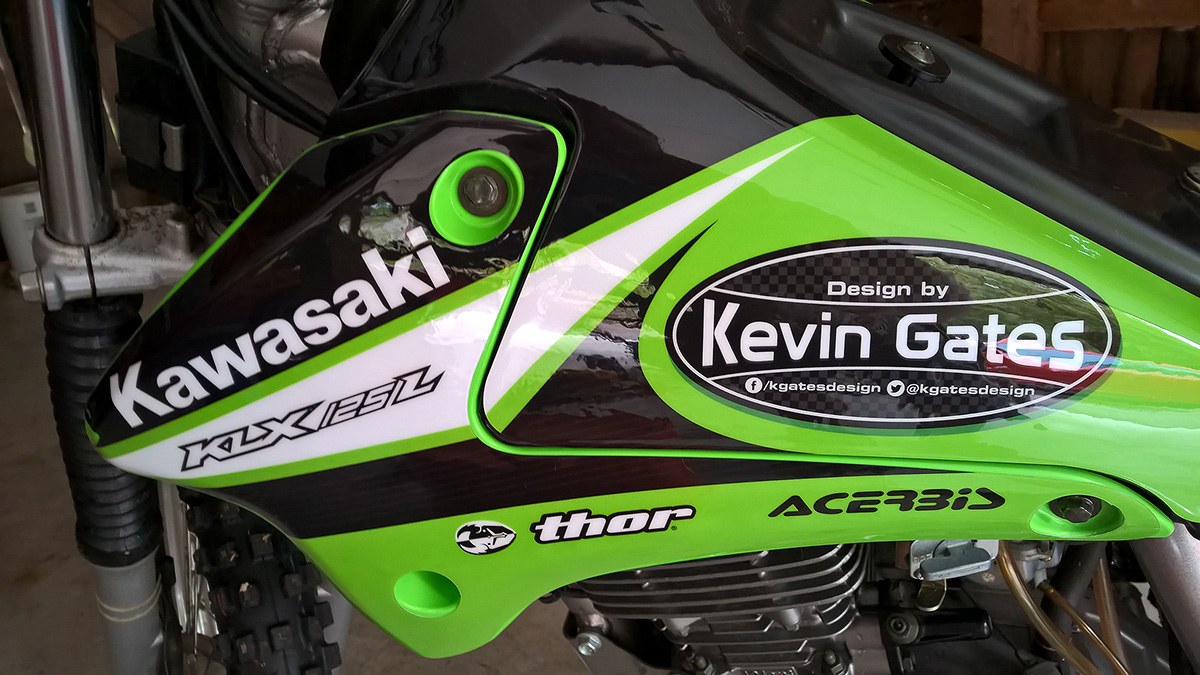
Here's a look at the bike with the completed side number plates, tail, and shroud panels re-installed on the bike. Notice that I've also applied gas tank graphics and the swing arm decals to each side Here the bike sits for each of the newly positioned panels to properly set and dry.

With the decal panels properly set and dried, the front fender, seat, and fork number plate panels are re-installed back onto the bike. My daughter, Natalie, wants to be the first to sit on the newly wrapped bike!
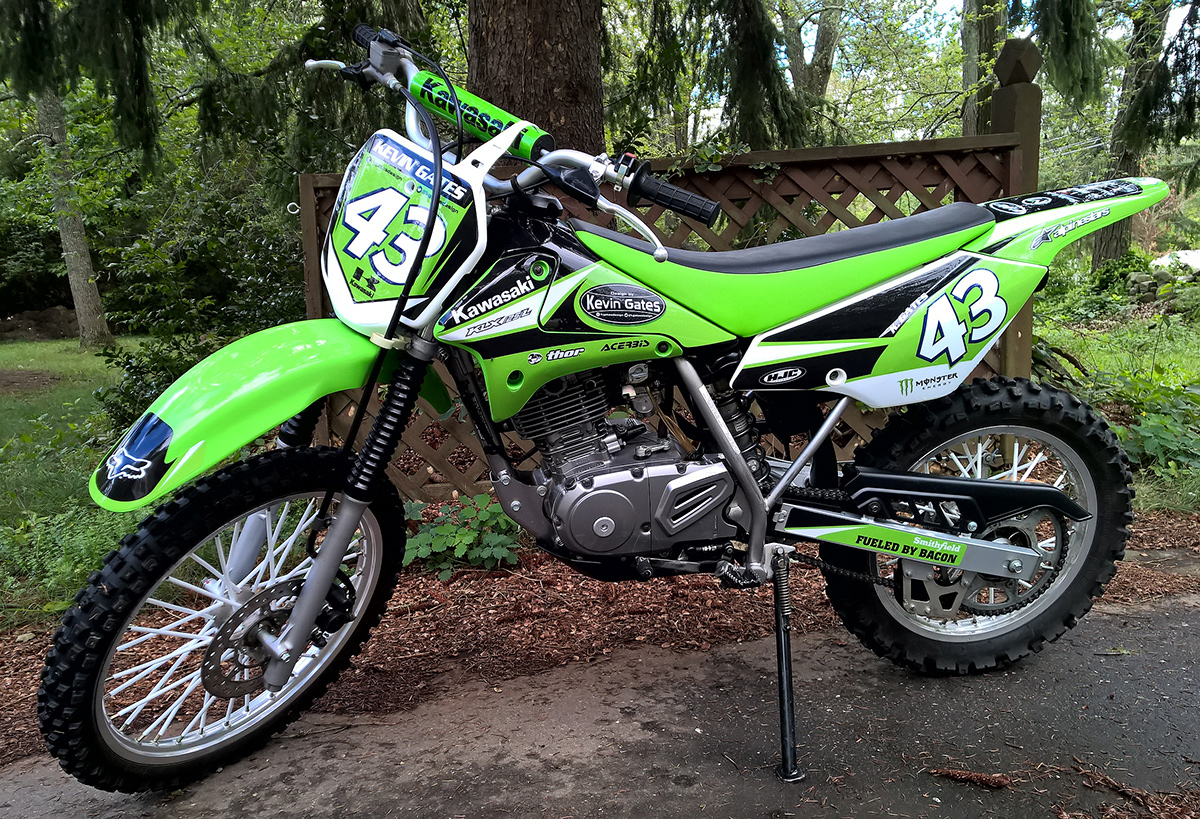
I then installed white Spoke Skins to the spokes of each wheel to help complete the look. I felt that these really help them stand out and complete the look of the bike in partnership with the new graphics kit.

Here's another view of the completed bike before getting back on the trails and getting dirty. Although the cosmetics of the bike are complete, future mods may include Acerbis handle bar brush guards and an FMF exhaust system.
Thanks for looking! If you liked this post or found it useful, please don't hesitate to appreciate my project by clicking the thumbs up icon below!
Interested in custom motocross graphics for your bike or ATV?
Interested in custom motocross graphics for your bike or ATV?
Contact me at bahamut443@yahoo.com
Be sure to also follow me on the web at the links below:
Be sure to also follow me on the web at the links below:


