
INTRO
Hello everyone, Breno here :)
I have made two versions of this detailed tutorial on how to create mandalas on Illustrator easily.
Where I'll teach you how to make a structure to quickly do mandalas just drawing one little portion of it.
The first version is a video recorded in the last month (yes it's my voice). I'm not a native English speaker, so be patient.
- aos Brasileiros: o video tem legendas em português -
The second one is a written version of the same tutorial. Some people like to read and follow it step by step, and considering my bad English, isn't a bad idea to follow it using the written version.
At the bottom of this page, you'll find two time-lapse video showing more about the process of creating the stucture and designing the mandala itself.
- - - - - -
BONUS: also I have provided for your confort, and also for learning matters, an Illustrator file done using this method.
So you can follow all steps with this help, or you can just download it and use it for free.
The link for download the file is at the end of this tutorial VERY CLOSE TO THE APPRECIATION BUTTOM
I hope you'll enjoy!
VIDEO TUTORIAL
WRITTEN VERSION
- - - - - -
After a lot of criticism about some unsuccessful attempts, I decided to make a detailed tutorial on how to create not just a mandala, but a way of creating mandalas easily and quickly editing symbols made on Illustrator.
In this tutorial I will teach you how to create this structure and give tips on how to draw a mandala.
How you can have noticed, I'm not an English fluent speaker, so I'll try my best, but if you don't understand something feel free to keep criticizing and cursing me in the comments.
First let's create the structure!
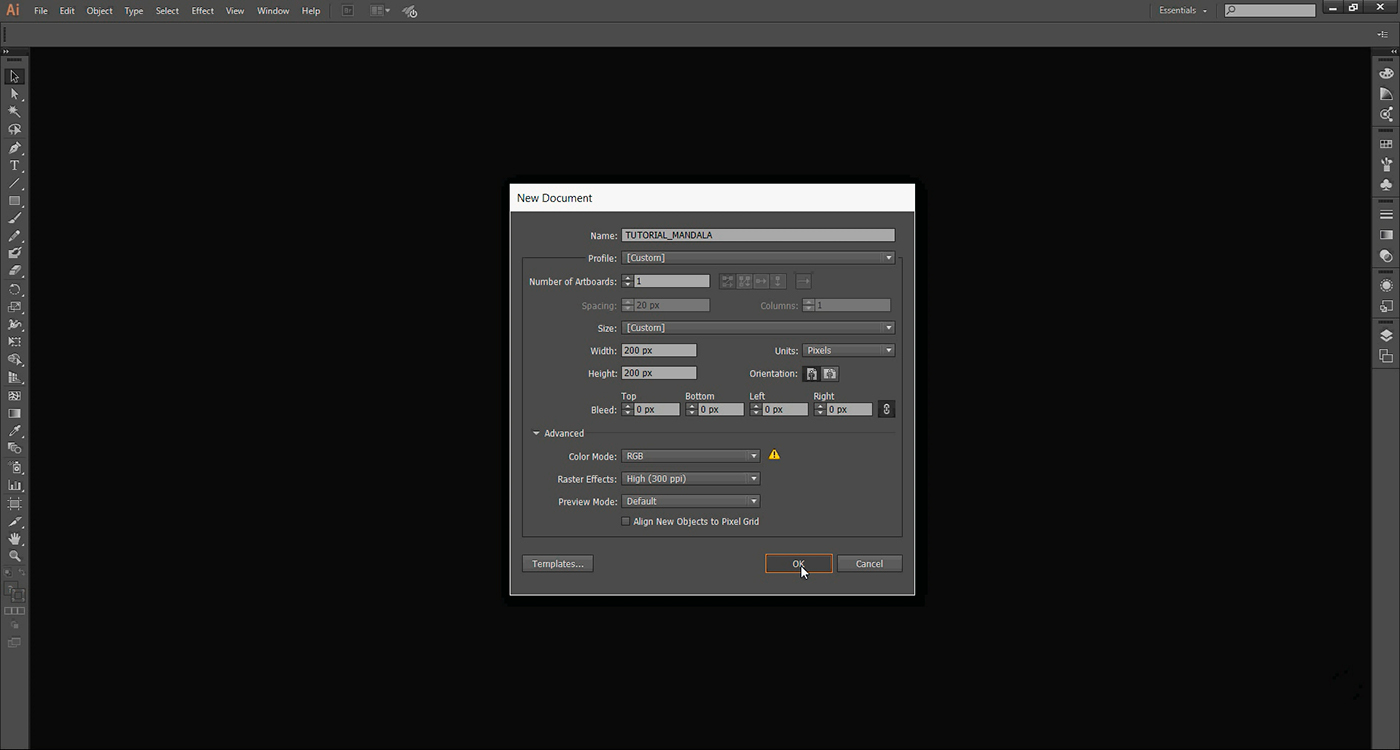
Step 01
Let's create a new document file using Ctrl+N shortcut
Artboard dimensions will have 200 per 200 pixels so the mandala structure can be centered
Step 02
The base of the structure will consist of a 16 sides polygon, one hexadecagon.
But you can create how many sides you want.
But you can create how many sides you want.
To create the polygon we'll use the POLYGON TOOL, let's click where you want this polygon to be created and press ENTER, in this dialog box we put the radius we want for this polygon and the desired amount of sides.
In this case I will use a polygon of 50px radius and 16 sides.
Created the polygon, we divide it into slices. In this case 16 slices

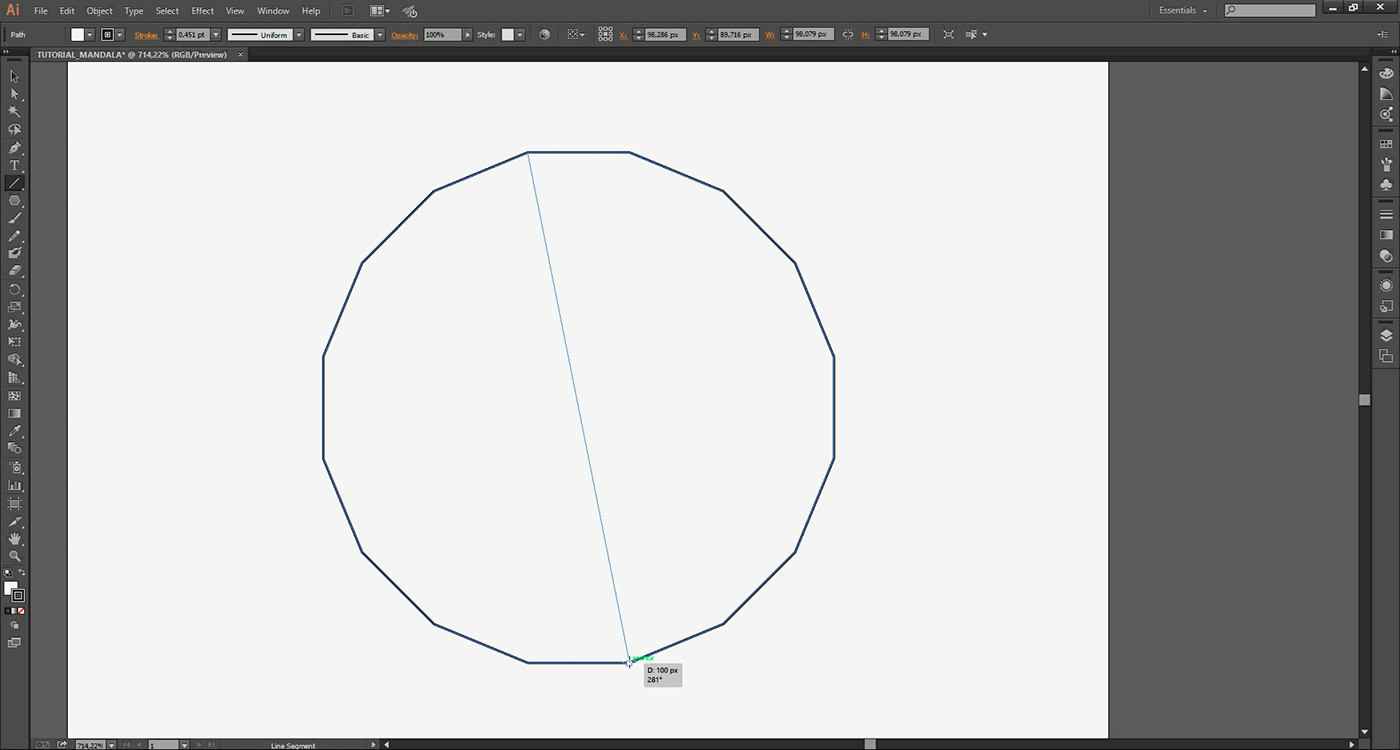
Step 03
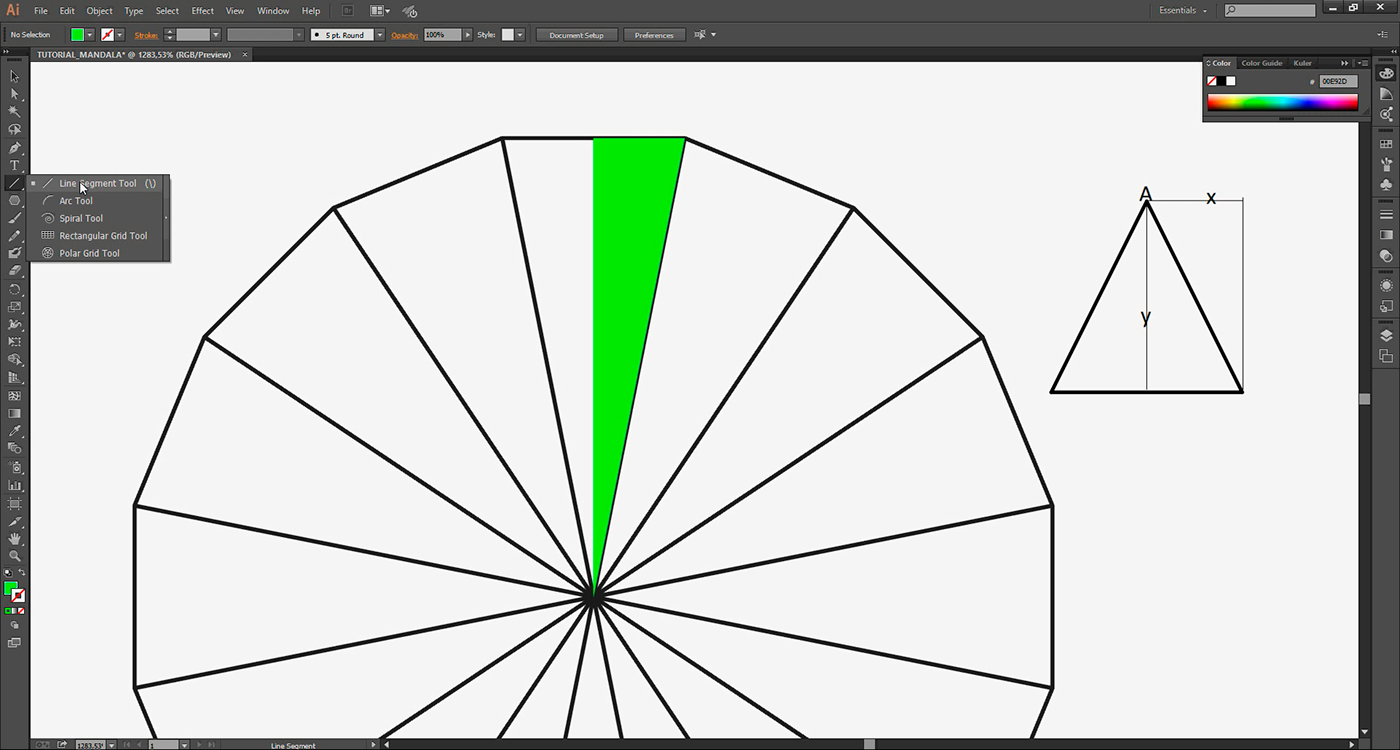
Using the LINE SEGMENT TOOL or by simply pressing backslash shortcut, we'll trace a line that will divide our polygon into two parts.
Step 04
Now to create all slices of our structure, we will select the line segment and using the rotation tool, let's rotate this line 22.5 degrees. I found this number simply dividing 360 degrees by the number of sides of our polygon, sixteen in this case.
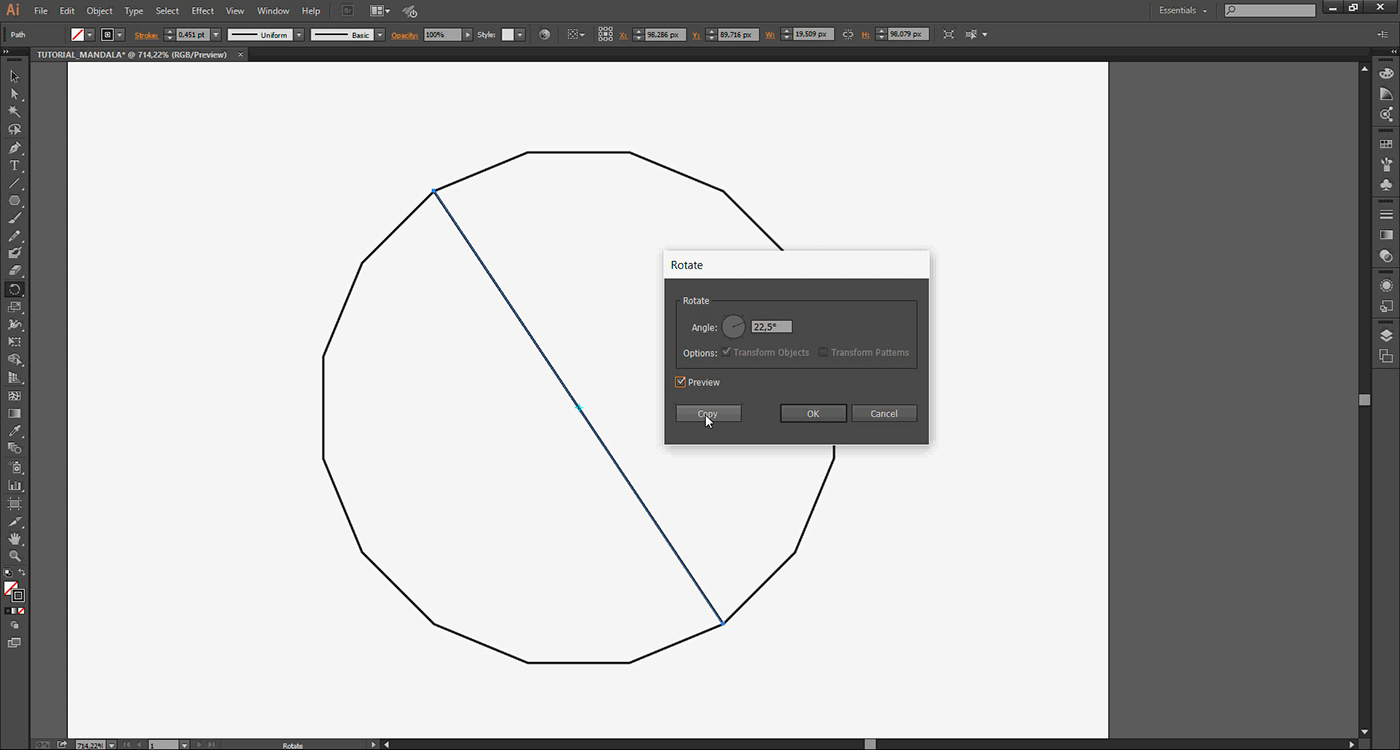
Step 05
Then select the line segment, press the R key and you will see this dialog box. Fill the tilt angle we want and instead of clicking OK we click COPY to create a copy of our segment rather than just rotate it.
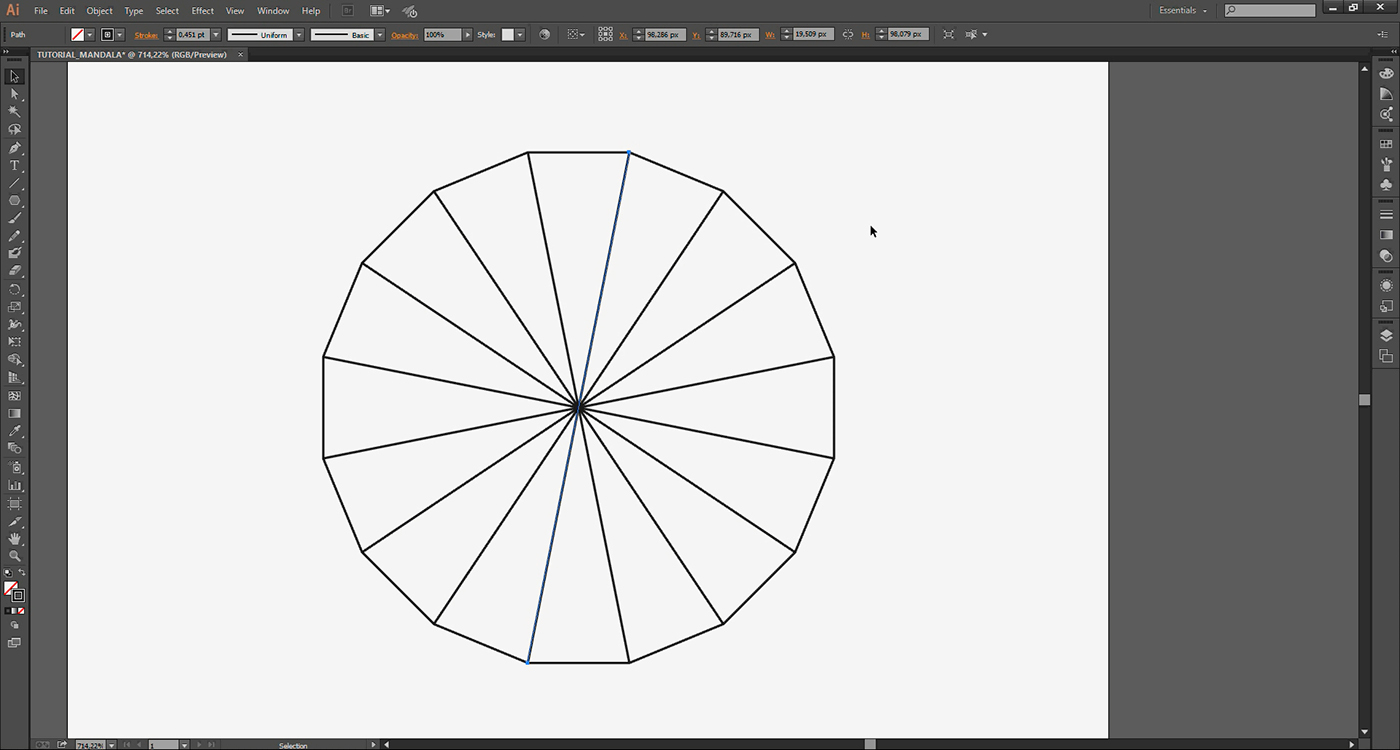
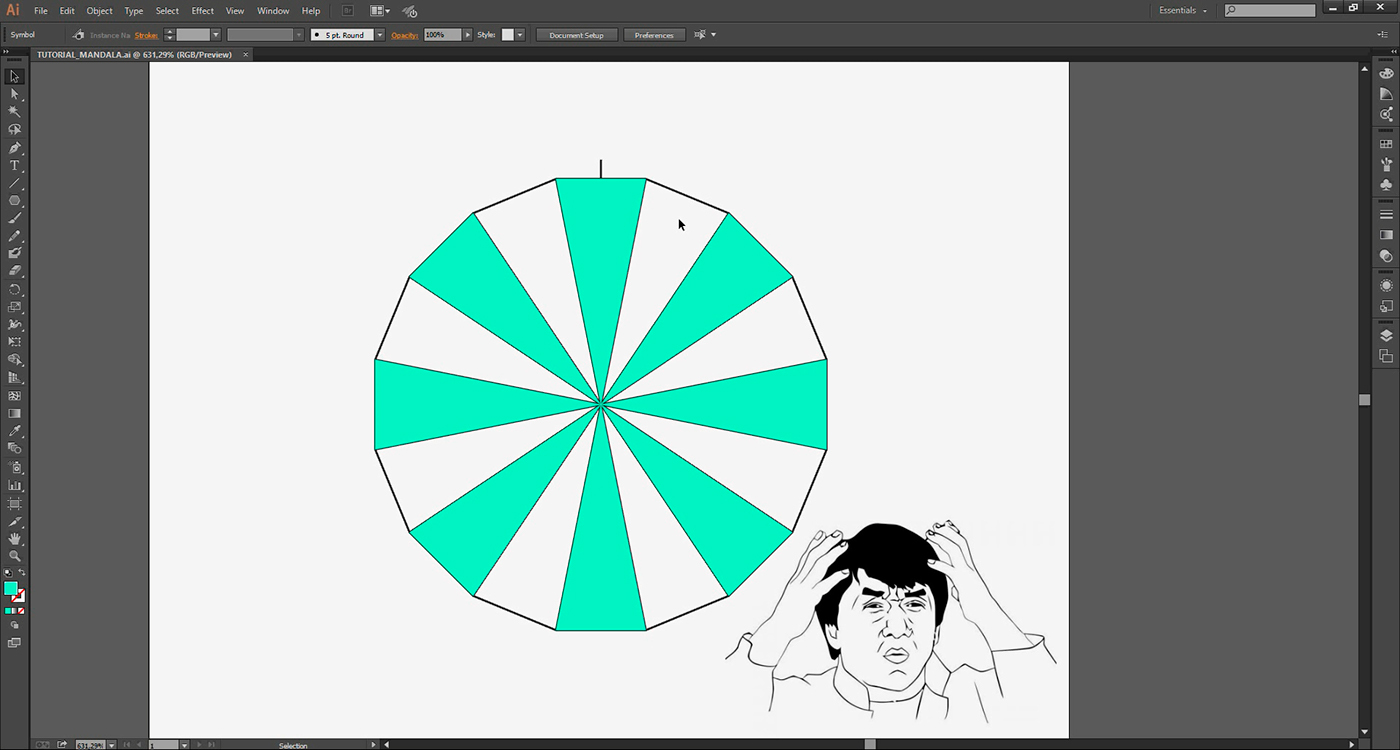
Done, all you need to do now is to use the shortcut CTRL + D, which repeats your last action six times and we have our hexadecagon splitted into slices.
Step 06
We don't need to draw on all these slices, but build one and the SYMBOL tool will create instances of that slice, automatically generated by illustrator.
In fact we will draw only half a slice, 'cause it is actually an equilateral triangle and we can use of this symmetry to further ease our lives.
So from the center of our structure, let's draw a segment that divides our main slice into two equal parts.
Step 07
Name the current LAYER as STRUCTURE and lock it by clicking here. Using CTRL + L shortcut let's create a new Layer and name it SYMBOL 1

Step 08
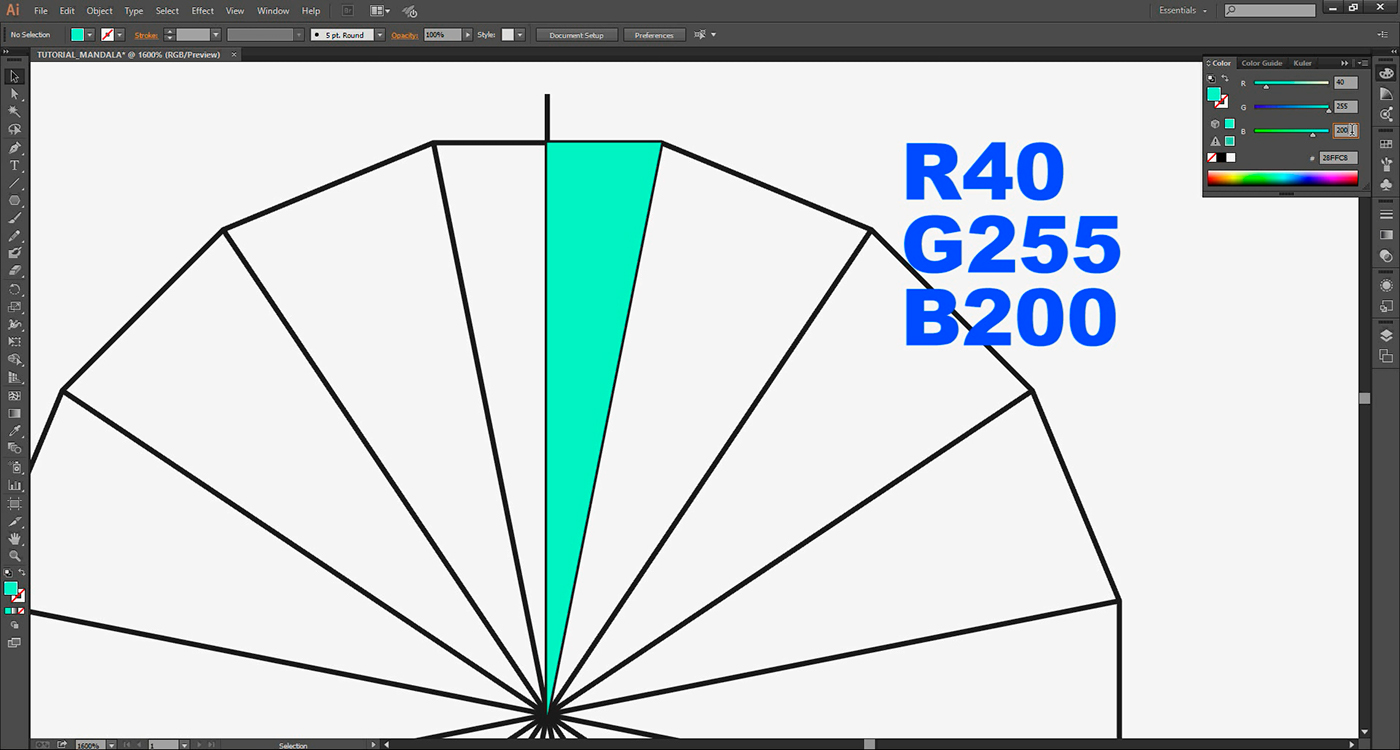
In this layer we will draw our symbol with PEN TOOL. Using the P shortcut, let´s draw one triangle on the right side of our main slice.
We will use a different fill color so you can see the area that slice will delimit within our structure, I'm using R 40 G 255 B 200 as color.
We will use a different fill color so you can see the area that slice will delimit within our structure, I'm using R 40 G 255 B 200 as color.
Step 09
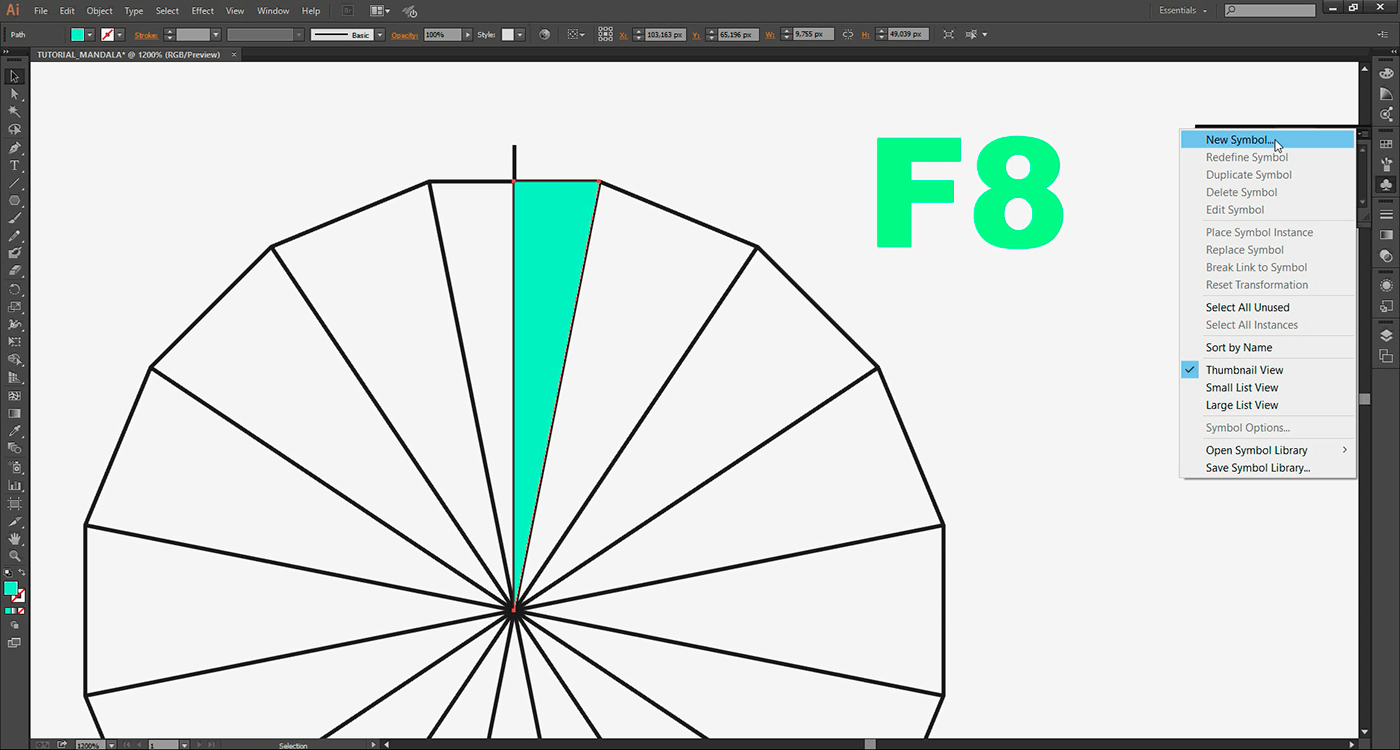
All we have to do now is transform our half slice in a SYMBOL, by clicking on the slice and the F8 key, or by using the Symbol panel by shortcut SHIFT+CTRL+F11
We will name this symbol as SYMBOL 1 and select type GRAPHIC, OK and done. We already have our first symbol, you can check it out in the symbols panel.
Step 10
Now all we have to do is distribute all symbol instances in place.
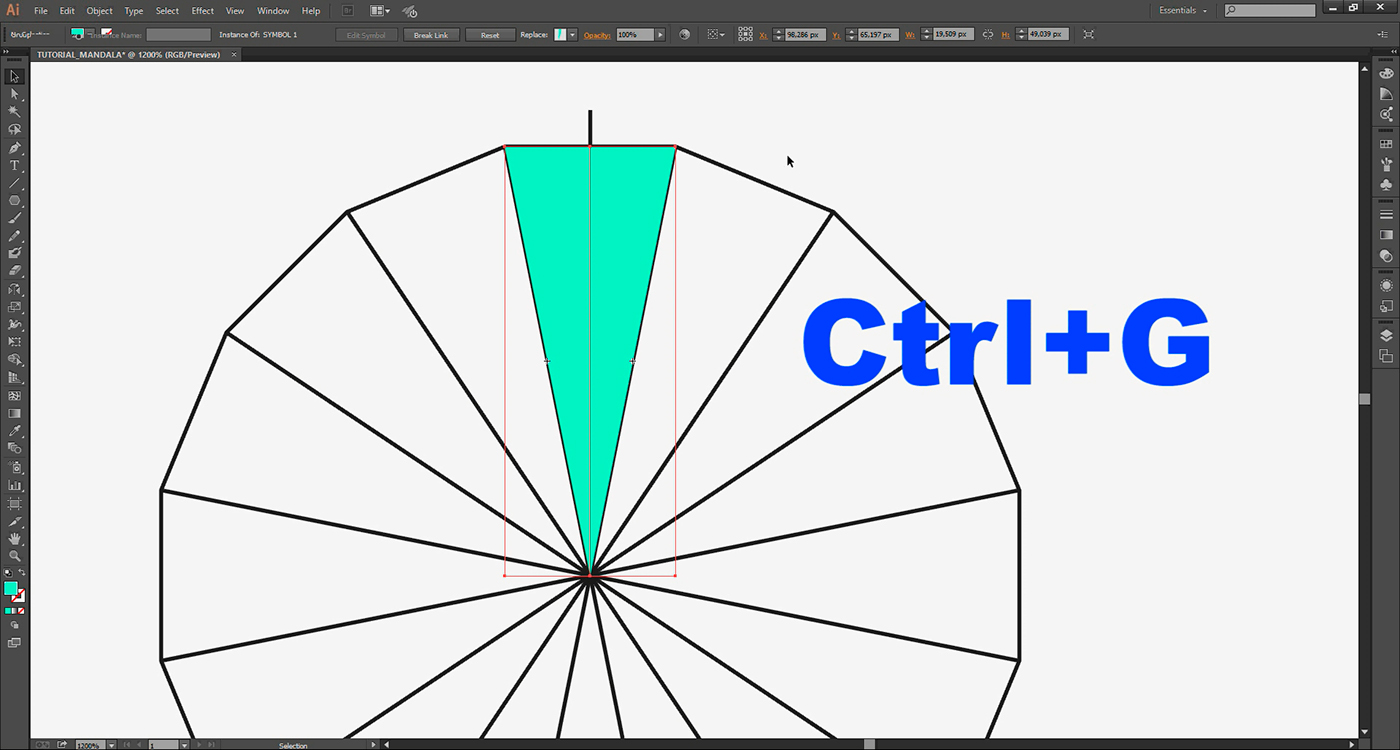
First, creating a copy of the half slice to create an entire slice. Click on the half slice and use the CTRL+C and CTRL+F to create a copy in the same place.
Now with the selected copy, using reflection tool, with O shortcut determines the reflection axis clicking first on the top left corner of our half slice and holding SHIFT click again anywhere below that point.
Okay, we have our slice. Select both halves and use CTRL+G to group them.
Step 11
All we have to do now is to rotate copies of this slice and our structure is ready.
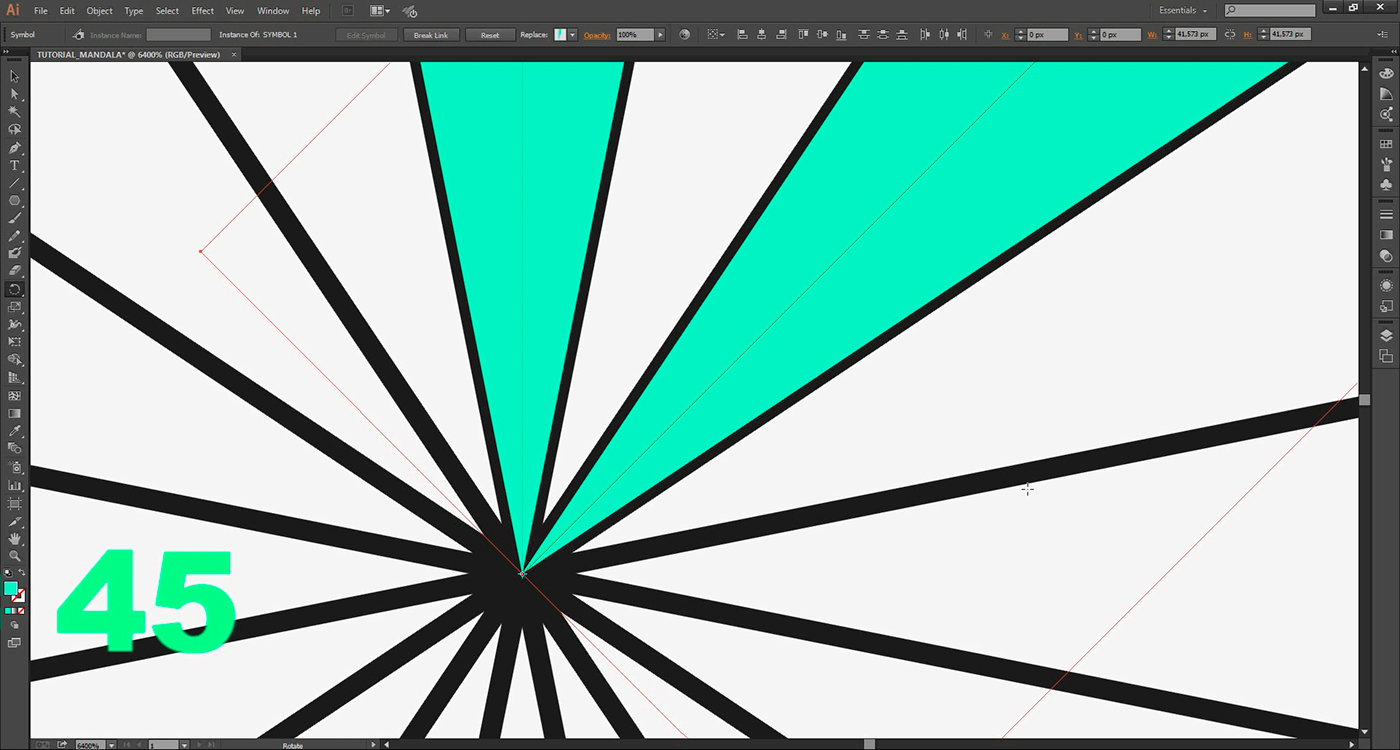
Select the slice, click R and select as rotation axis its bottom end.
Now rotate dragging the cursor holding ALT and SHIFT to create a copy.
Now rotate dragging the cursor holding ALT and SHIFT to create a copy.
The Shift key snaps the rotation to 45 degrees (not by coincidence is double the number 22.5 we find at the beginning)
Use CTLR + D more six times to complete our SYMBOL 1 structure
Step 12
You may be wondering now "why the slices were distributed skipping a space?", soon everything will make sense, you are doing it right.
Now, let's make another variation of the slice, so that our mandala does not result so obvious and regular.
Step 13
To do this, select our main slice and use CTRL+C to copy it, remember to lock your layer SYMBOL 1.
Create a new Layer using CTRL+L, above the layer 1 and name it SYMBOL 2
Use CTRL + F to create a copy in the exact layer below slice place.

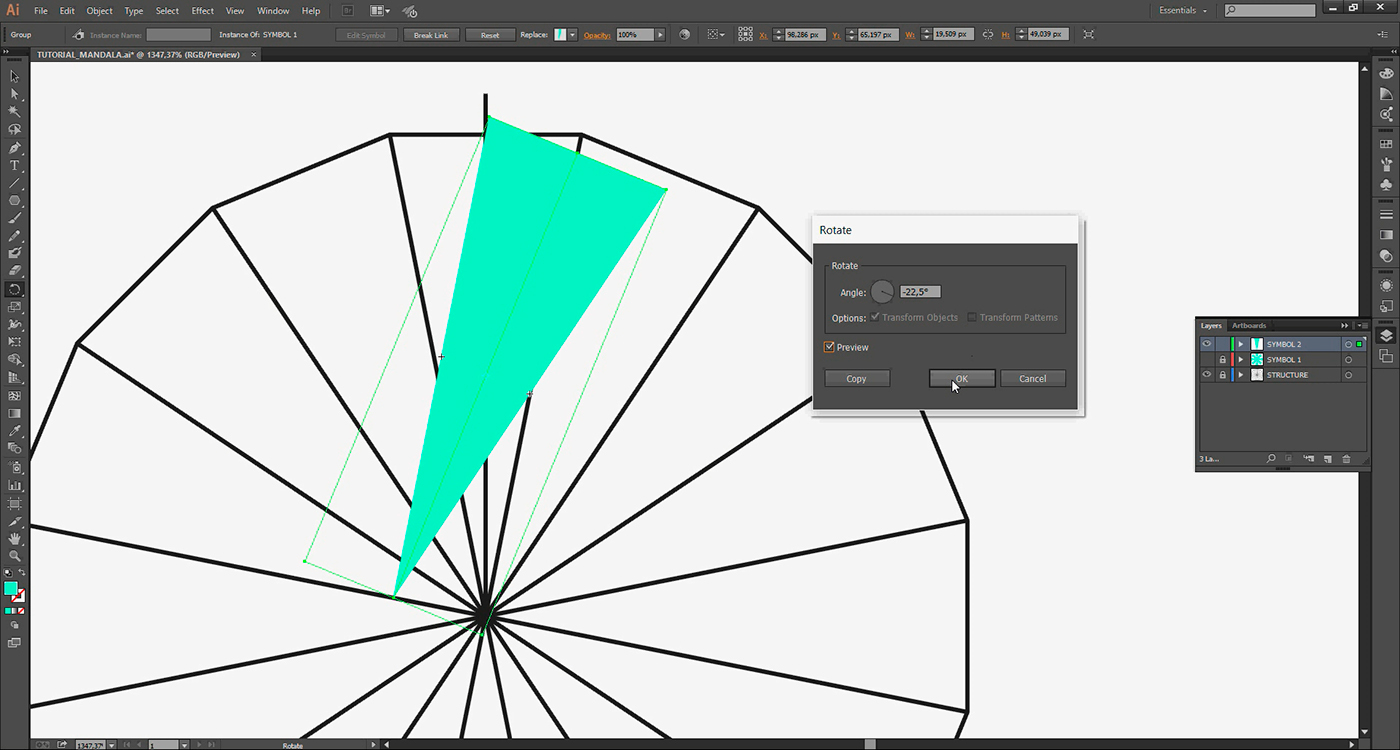
Step 14
With the main slice that you just paste selected, press the shortcut R and ENTER to rotate it -22.5 degrees and position it exactly in the right slice tilt, click OK.
Adjust the position properly aligned with the initial structure.
Step 15
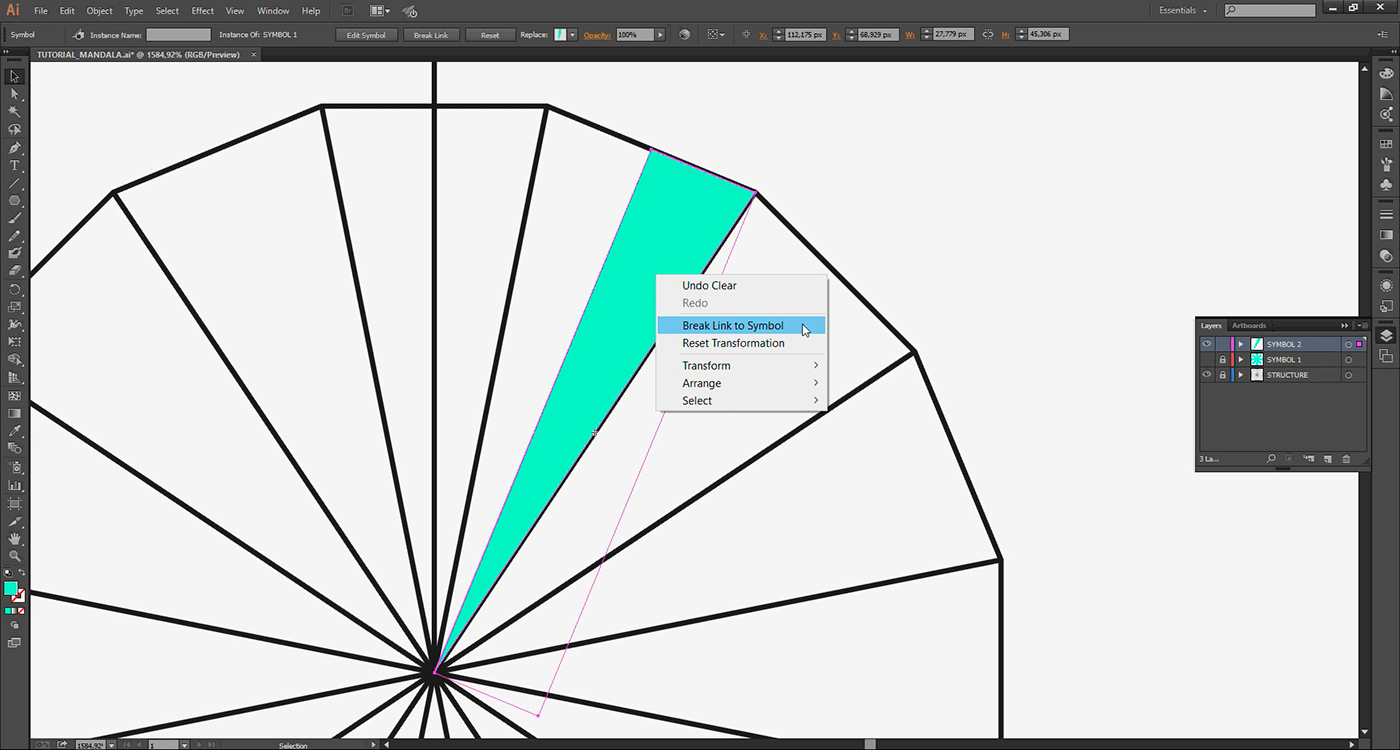
Now we need to break the link of this slice and create SYMBOL 2.
Select the slice of SYMBOL 2 layer and ungroup it, CTRL+SHIFT+ G or right-click and ungroup option.
Select the left side of the slice and delete it, select the right side and click the BREAK LINK TO SYMBOL option
(you can find this option also on the symbols panel).
(you can find this option also on the symbols panel).
Step 16
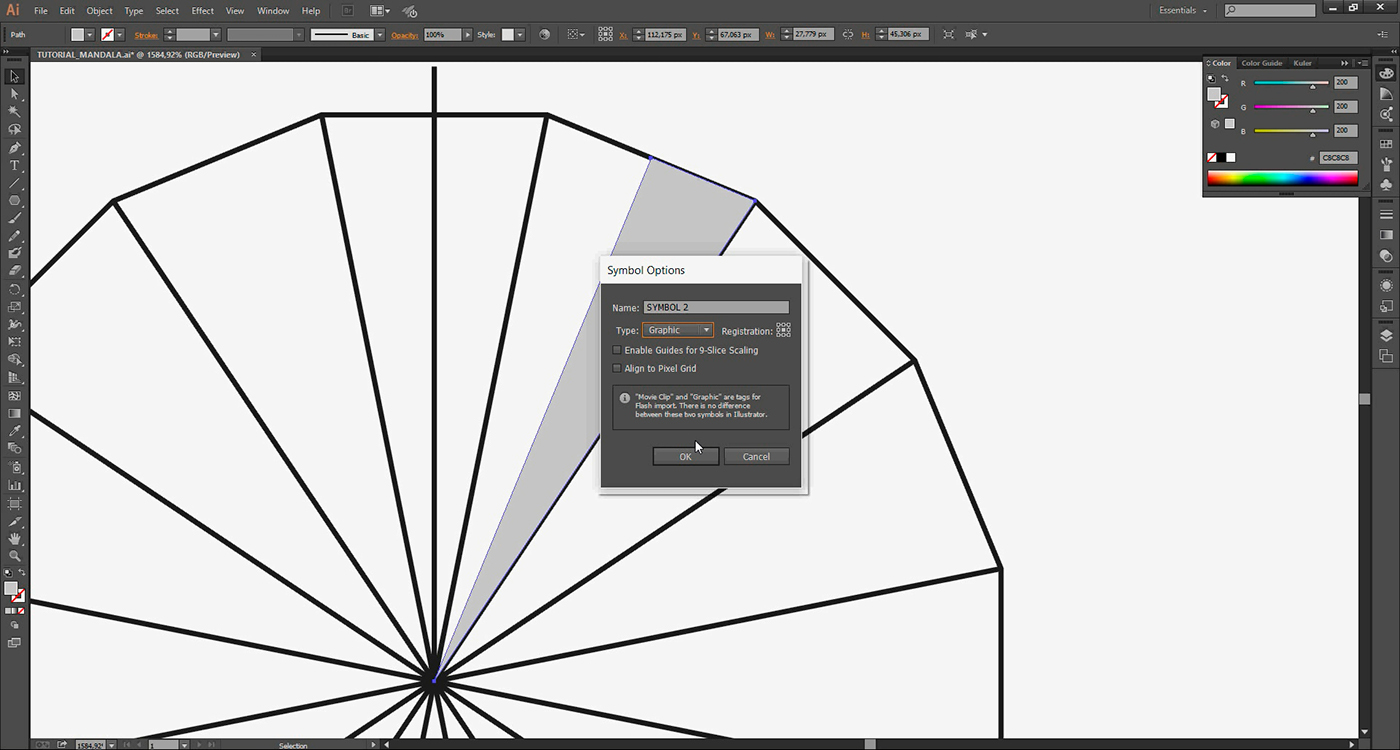
Now by clicking this half slice, we will change it color for R200 G200 B200 color and we'll press F8 to create a new symbol that will name SYMBOL 2, graphic type as we did with the previous symbol.
Step 17
Now we will make a copy of that half slice and with reflection tool O shortcut, we click to determine the reflection axis and holding shift and clicking somewhere below that point we will reflect it.
Now using the rotation tool R shortcut, we will rotate it -45 degrees and it's ready for us to complete our second symbol.
Place this second half in the correct location, click the two halves and group with CTRL + G.

Step 18
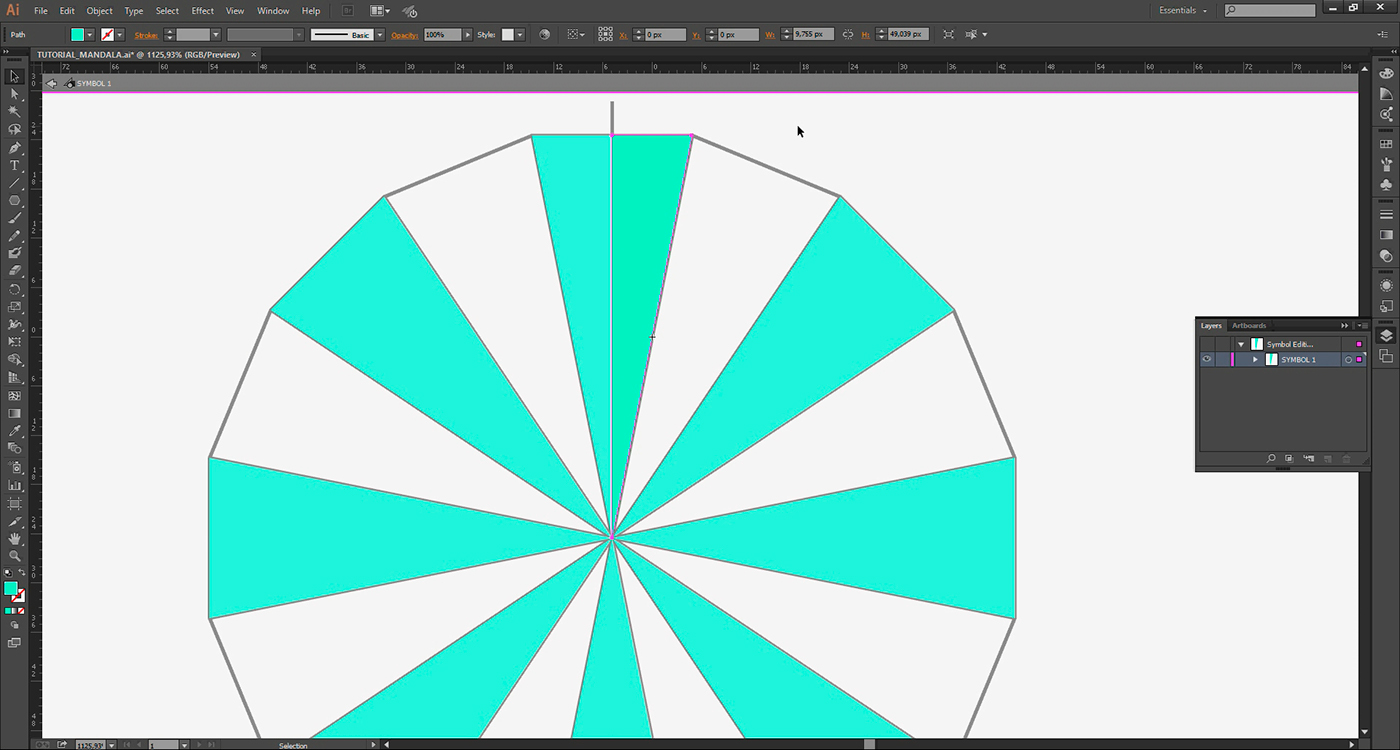
All this work has a reason: When you edit the two main halves of your mandala, by double-clicking the original symbol will appear in the same place that it was created.
In order for this location matches the place where it already is now, and make your life easier when designing your mandala, is why we did all this procedure.
Step 19
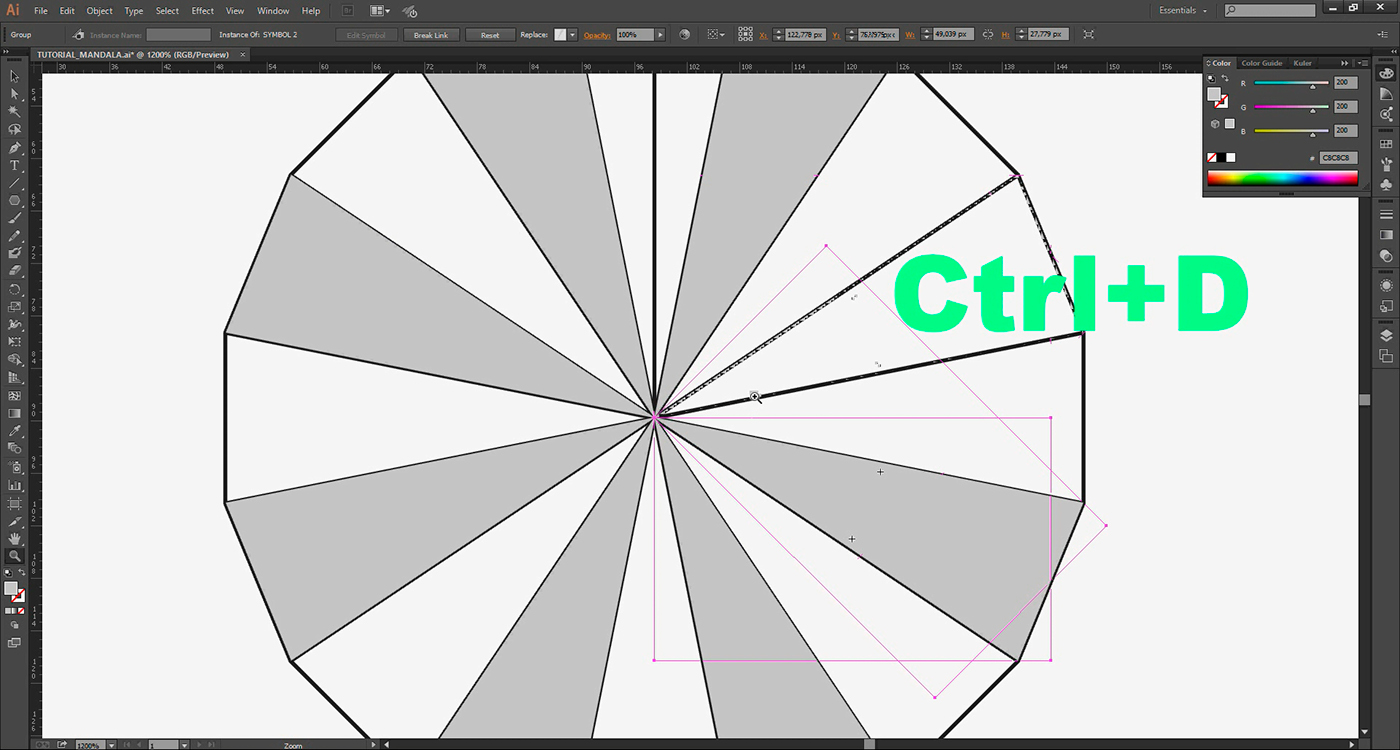
Now select our symbol 2 and we will do again the rotation procedure creating a series of six instances of this slice, filling the empty seats left in the previous, determine the rotation axis at its lower edge and holding SHIFT and ALT create a copy.
Use CTRL + D to create the remaining six copies.
Use CTRL + D to create the remaining six copies.
Step 20
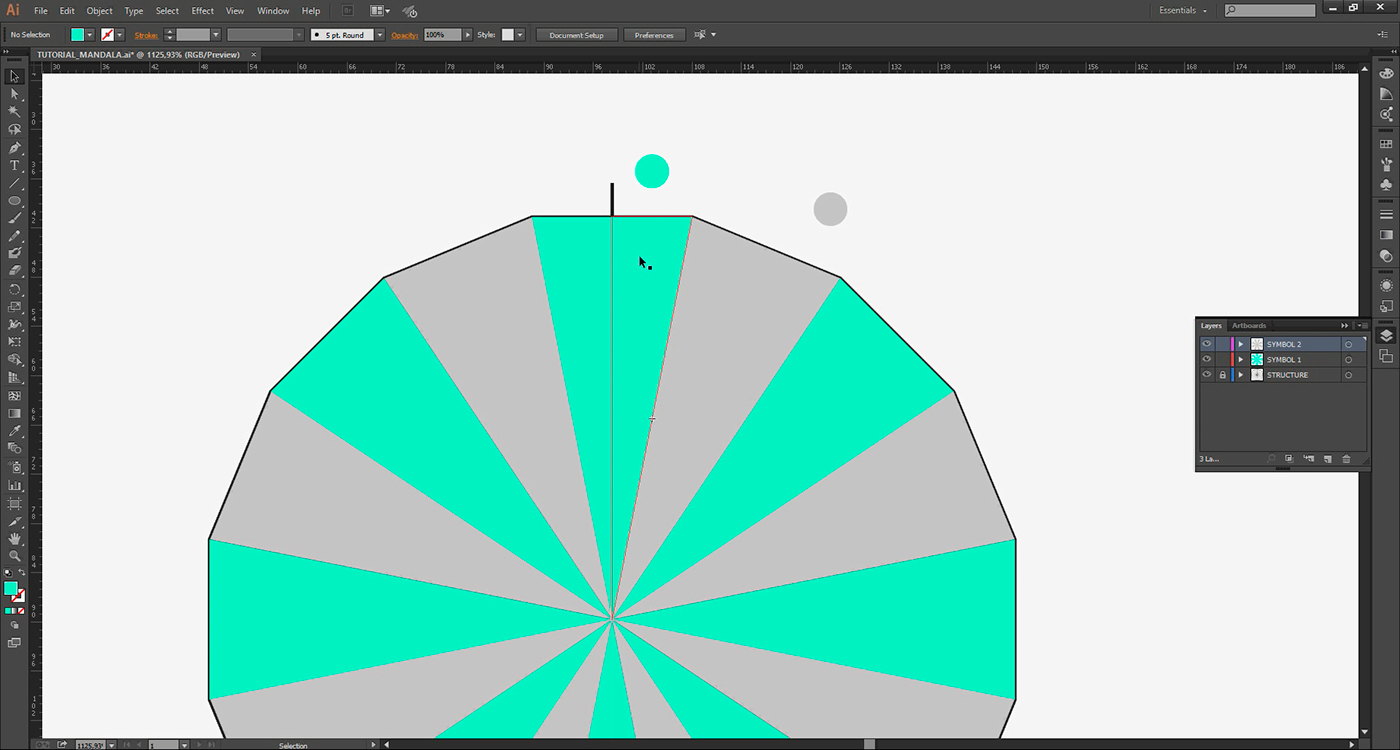
Now you have two main half slices to draw a mandala in an automated way without it seems too simplistic and repetitive.
Remember the positions of main slices, 'cause are the ones that you can draw and original symbol will stay positioned in the same place.
The Layer 1 is here and Layer 2 is here. These are the only areas that will draw you to build your mandala.
Step 21
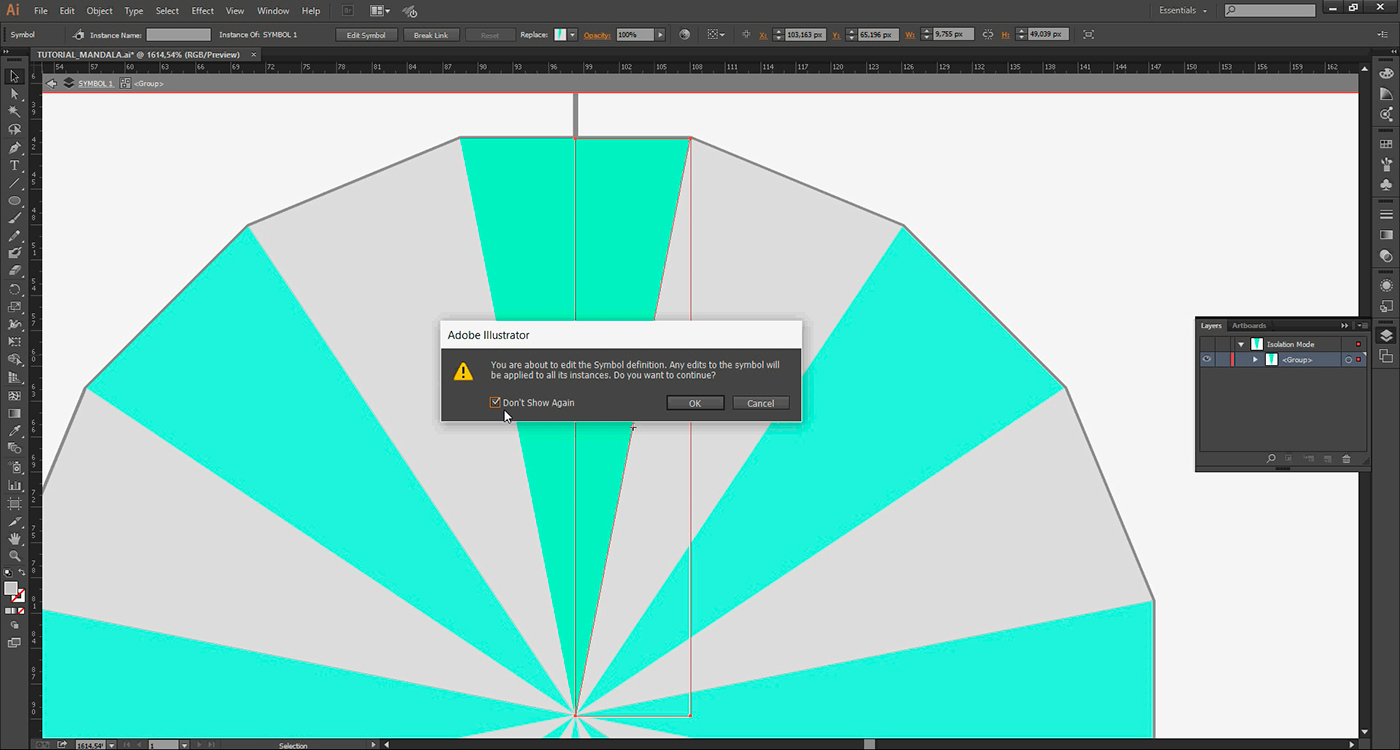
We'll draw the mandala editing these two symbolos, and to do this you simply double-click to access the group and double-click again to edit the symbol.
Will appear this warning, all you must press is OK. (I strongly recommend you to select the 'do not show anymore' before giving the OK cuz u will edit this symbol many times and this warning will be annoying)
Step 22
When I design my mandalas usually divide the slice into segments, so I can better visualize the space and fill it with more 'organized' designs.
For that I will draw a segment just on this side of our half slice using the shortcut backslash using a 1pt stroke and a lighter gray to not mess up our design view R222 G222 B222.
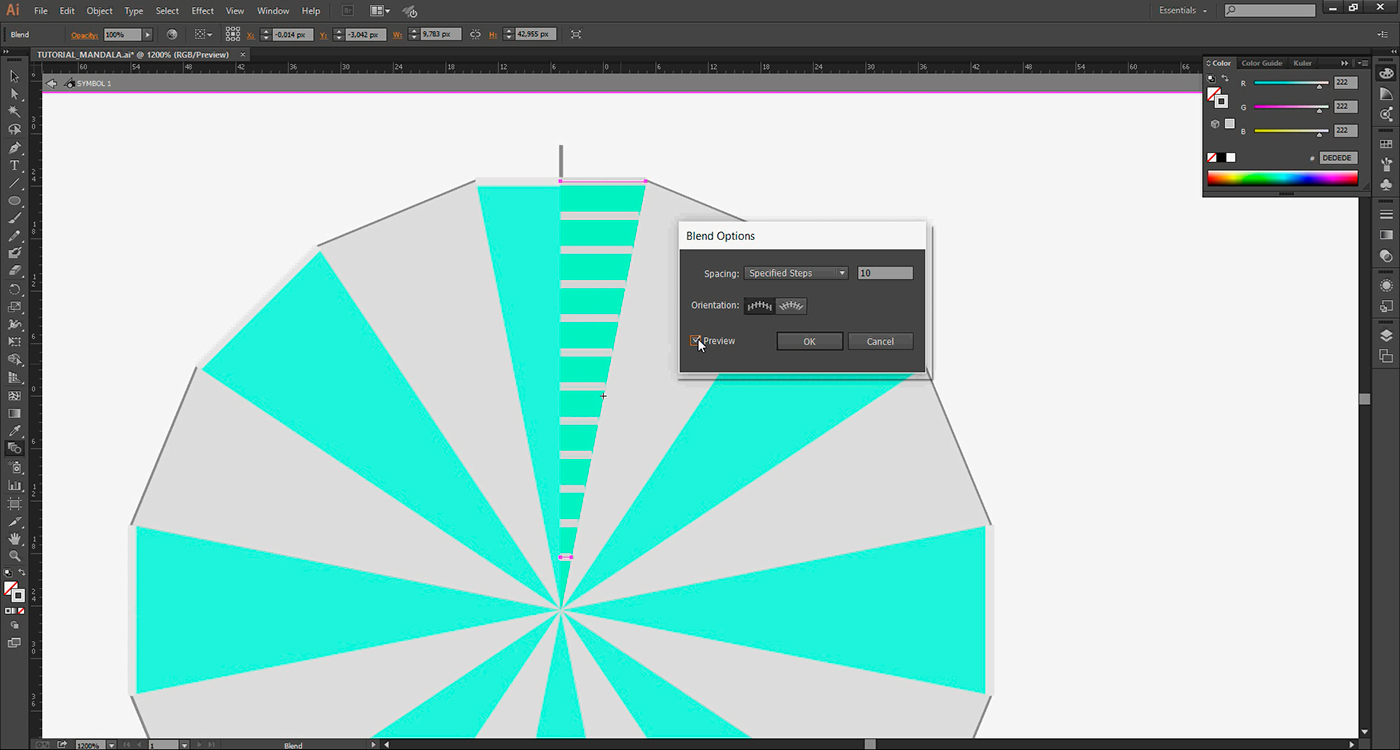
Now we will make another short line at the lower end of our half slice parallel to the first line covering only the triangle area.
We will select both slices and using BLEND TOOL W shortcut will click on the two line segments.
Still with lines selected press enter to define the amounts of intermediary lines for this "grid".
At SPACING go SPECIFIED STEPS and clicking on the desired number and preview we can get a sense of how this grid will look like.
You are free to choose the level of detail you prefer, I will use 10.
Step 23
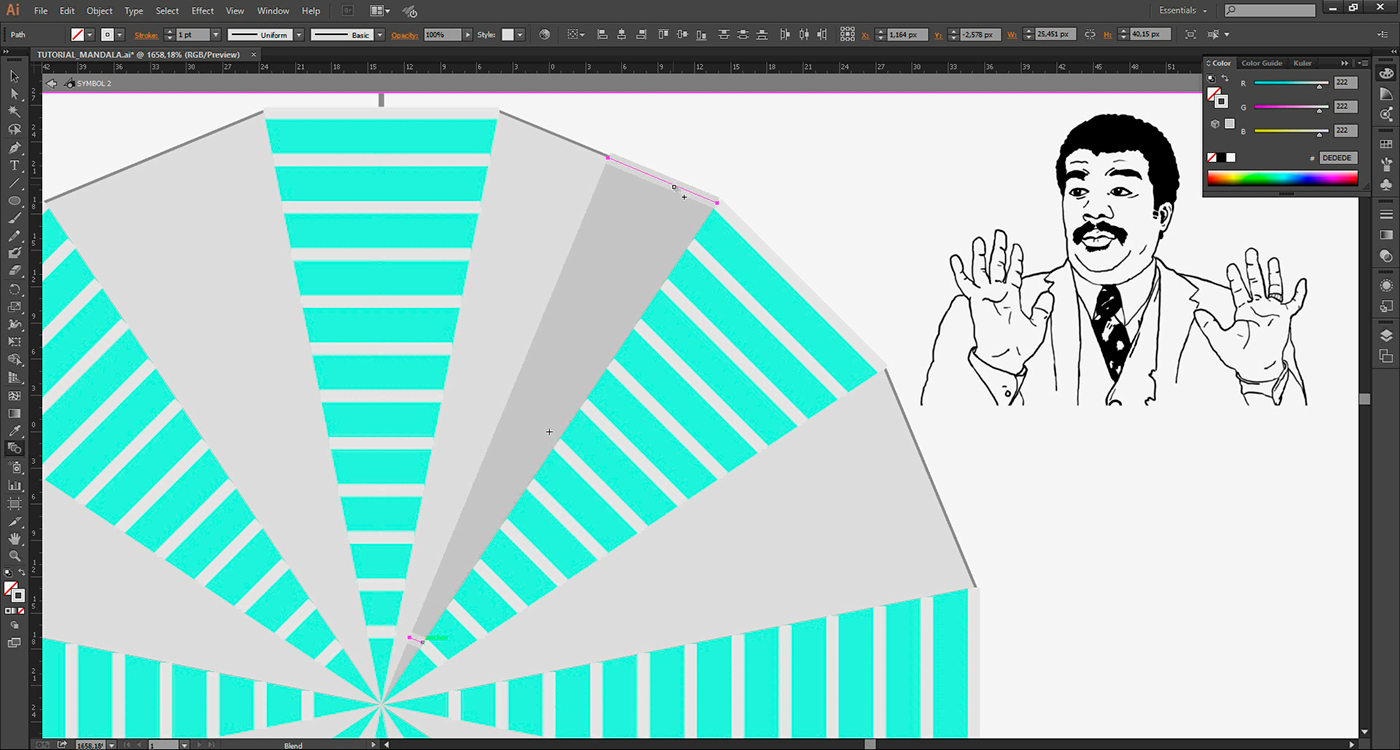
Instead of repeating the same procedure in other main slice, you can just copy this sequence of lines within the SYMBOL 1, access SYMBOL 2 and set it there.
Unless you are an expert and want to use different amounts of reference lines on each slice and let your mandala even more incredible, I will use 22 intermediary lines as an example, we have done a perfect structure to create our mandala!
I prefer to create a grid within the symbol 'cause so I may use less standardized ways to prepare my grid and it will be replicated in all instances of the mandala.
This does not happen if for example you used a grid in a separate layer on top of all others.
This does not happen if for example you used a grid in a separate layer on top of all others.
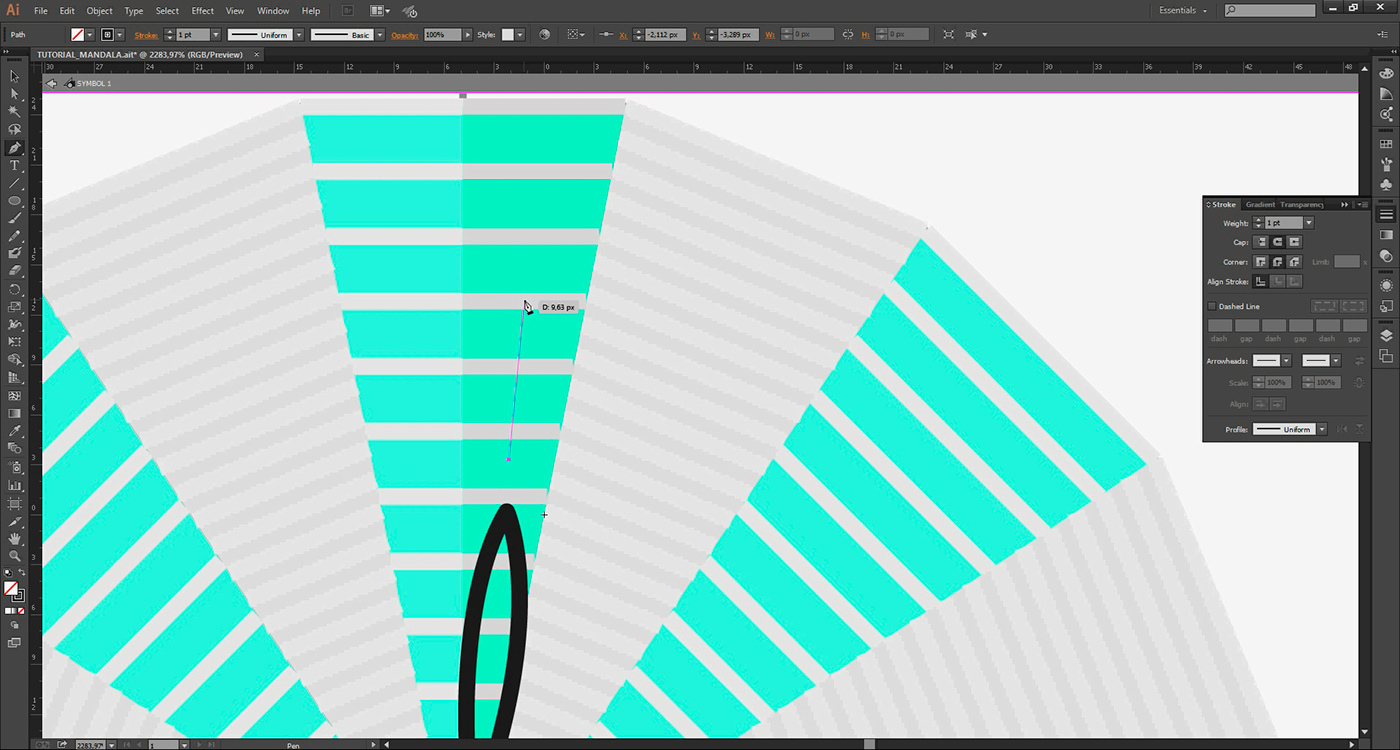
Step 24
Save your file as a template and it can serve as a basis for you to create dozens of mandalas in many different ways.
Use the PEN TOOL to draw within each of the two half main slices and see how the illustrator apply the changes to all instances of the symbol when you finish editions.
So you can spend more time thinking about the design you want execute and less manually doing the repetitions.
SOME HINTS & TIPS
TIP 001 -
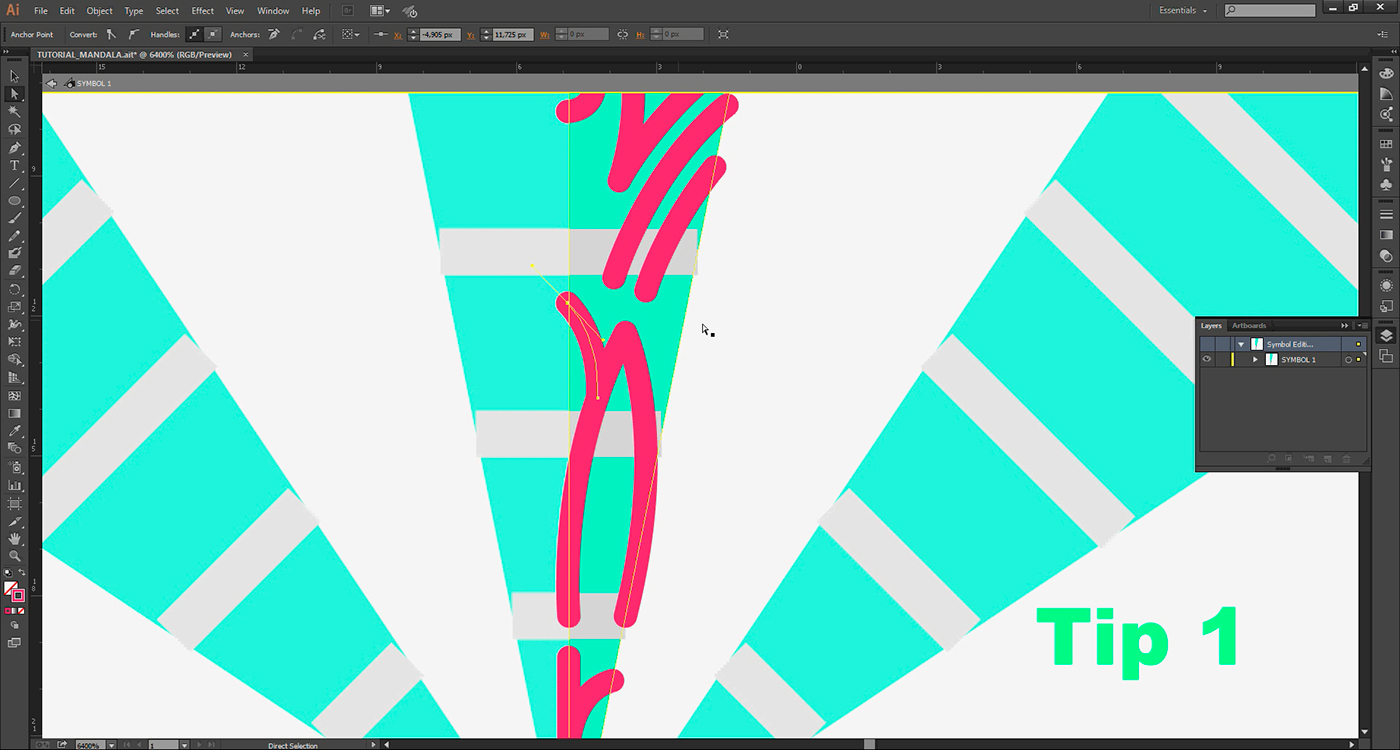
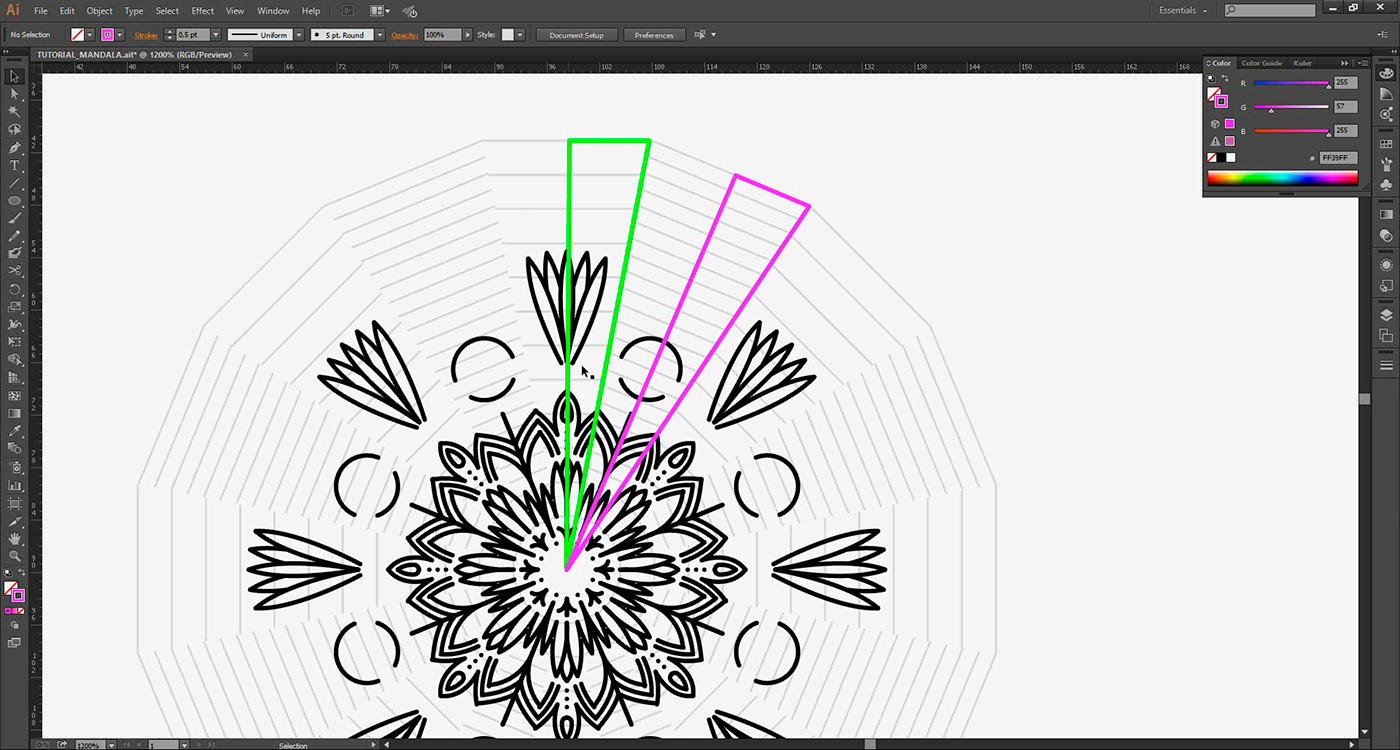
When designing, remember that this is only half the slice and you can use this symmetry to make designs that are completed with the other side of the slice
When designing, remember that this is only half the slice and you can use this symmetry to make designs that are completed with the other side of the slice
TIP 002 -
To make a dot, make a short dash and then selecting one point, drag to the other one
To make a dot, make a short dash and then selecting one point, drag to the other one

TIP 003 -
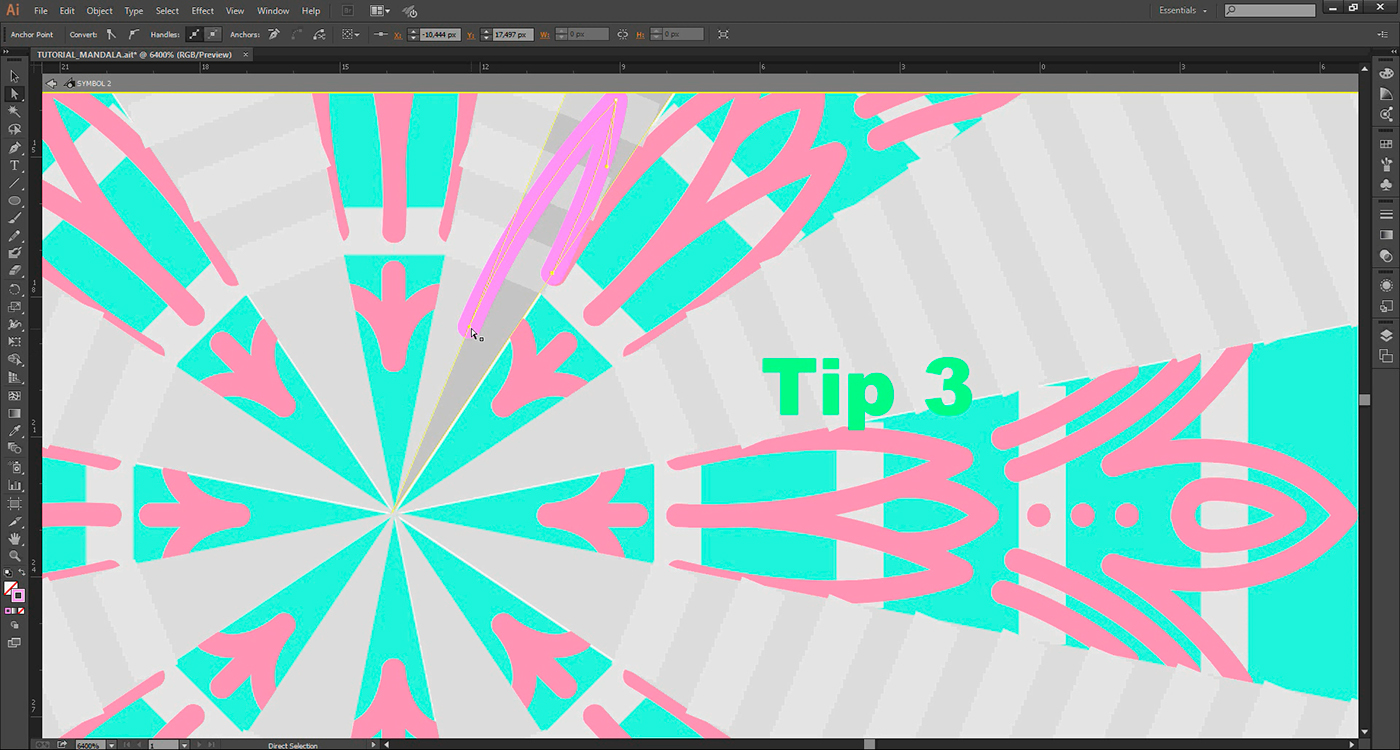
Switch between the two variations when designing to get a better sense of how the design is getting
TIP 004 -
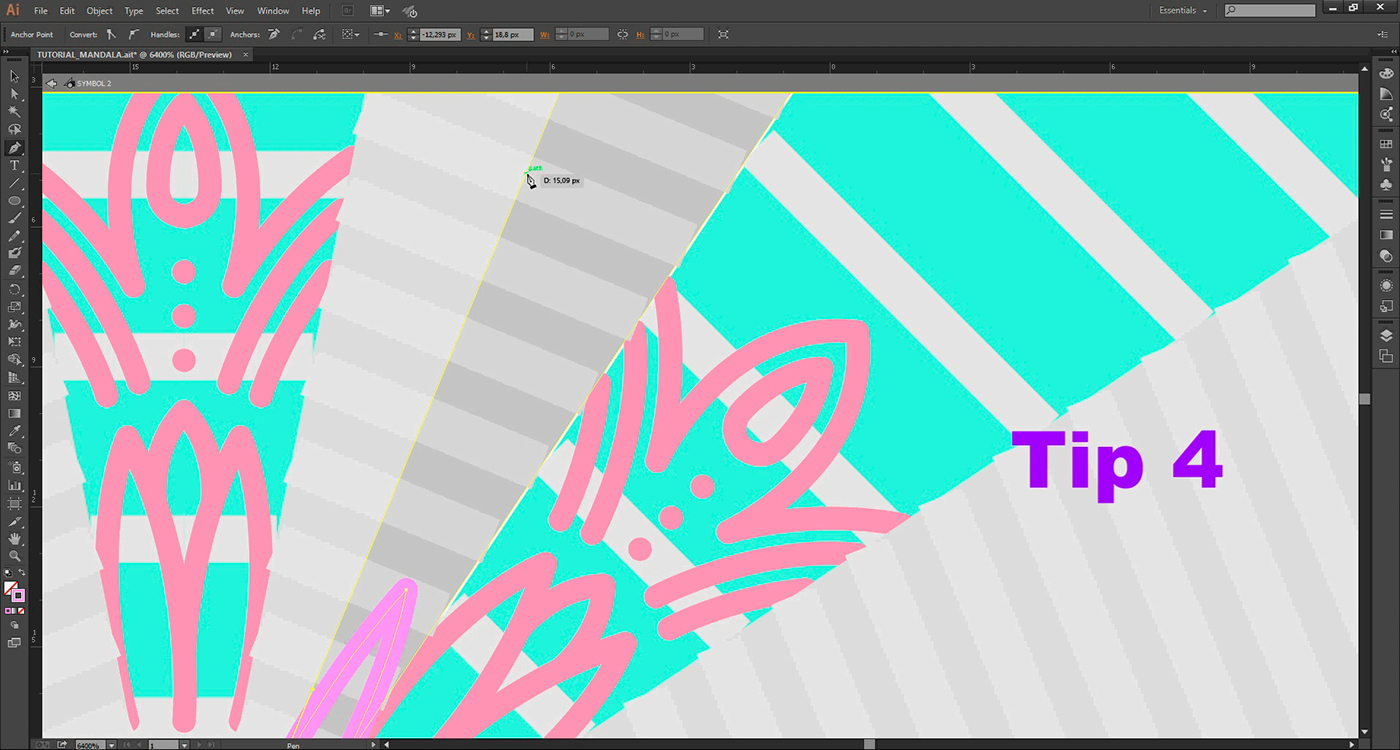
Draw lines that match the initial structure, it will help you understand what you are doing, even if you delete them later
Draw lines that match the initial structure, it will help you understand what you are doing, even if you delete them later
TIP 005 -
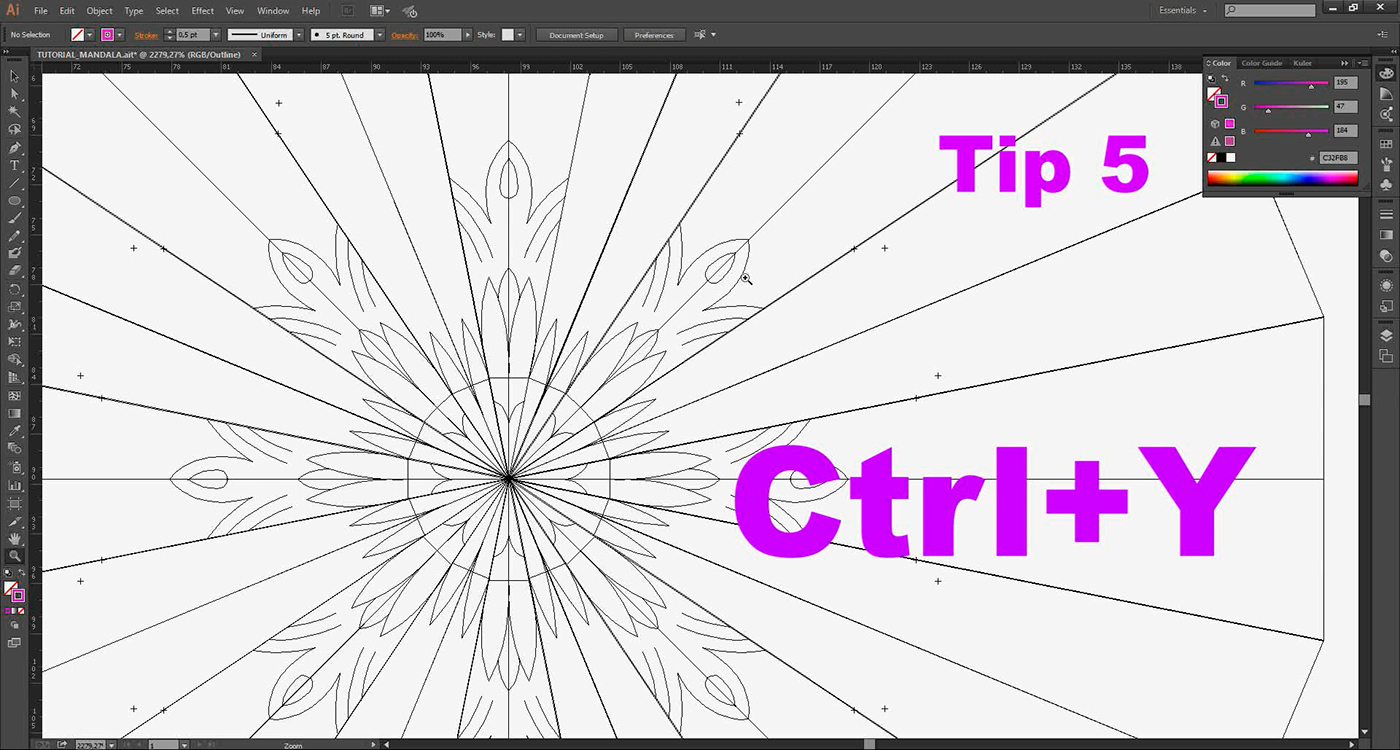
Use Ctrl + Y all the time, it will help you better visualize how your mandala is getting
Use Ctrl + Y all the time, it will help you better visualize how your mandala is getting
TIP 006 -
When you are more familiar with the structure created, you can go getting rid of it to see more clearly how your design is getting.
When you are more familiar with the structure created, you can go getting rid of it to see more clearly how your design is getting.
Feel free to go deleting the elements of its structure, or leaving them less visible

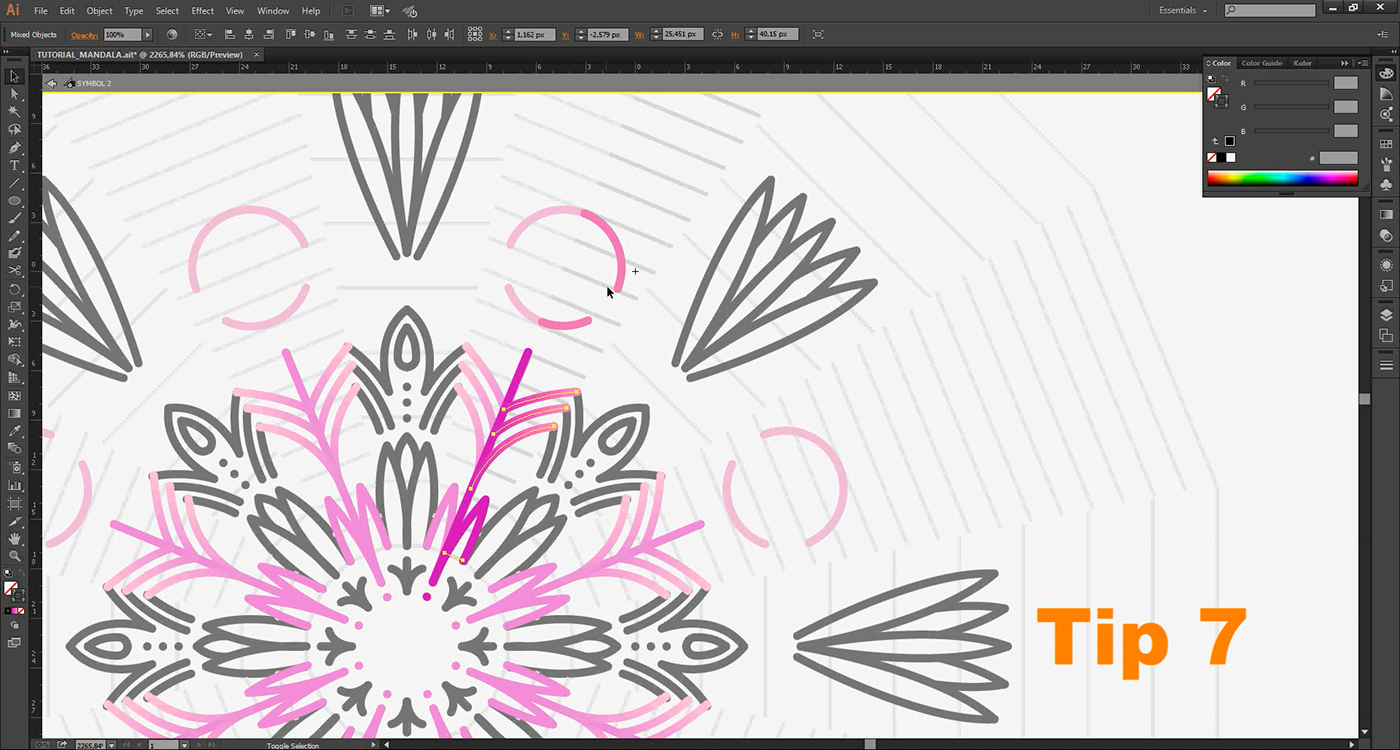
TIP 007 -
If you think working with colors are tough, you can work in black first
If you think working with colors are tough, you can work in black first
TIP 008 -
Just keep in mind that you need to work only in these two areas
Just keep in mind that you need to work only in these two areas
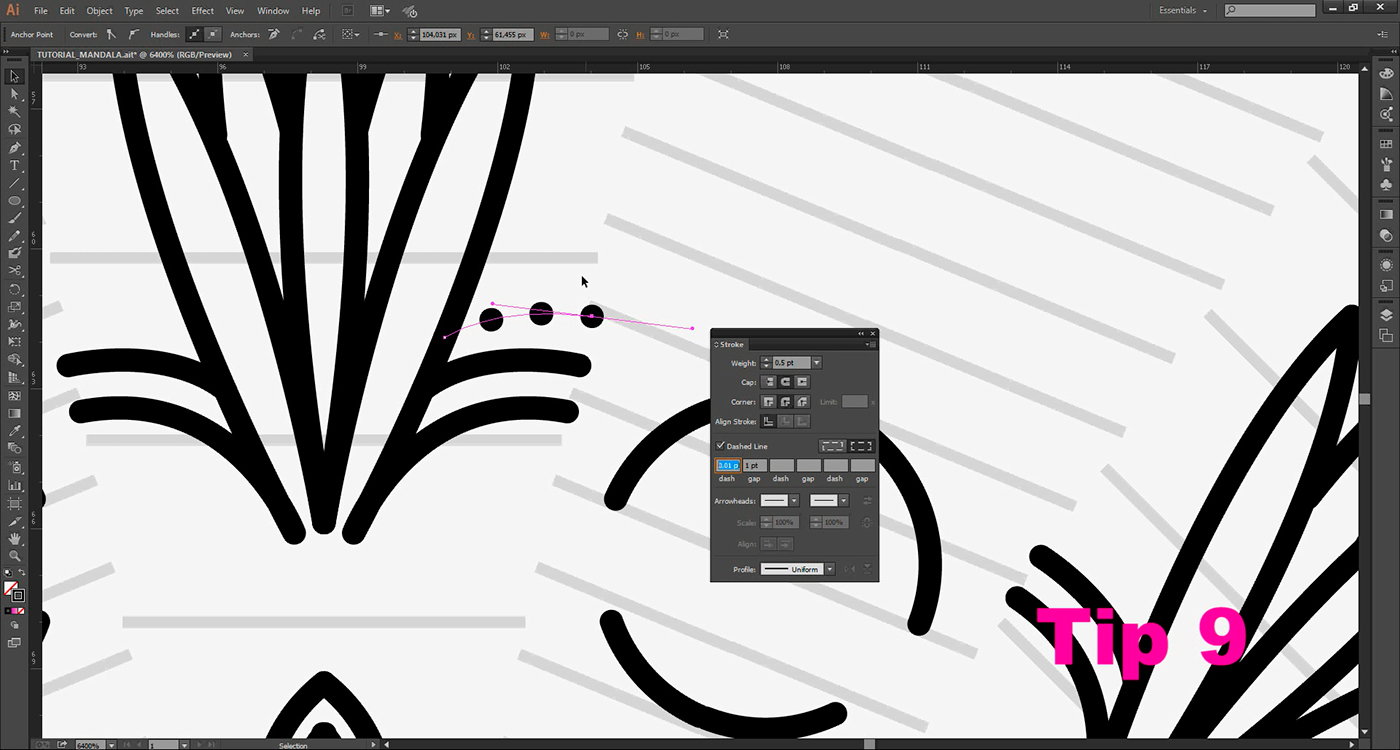
TIP 009 -
When doing a serie of dots, use dashed line with a very low size to dash like 0,01 and 1pt for the gap
TIME-LAPSE VIDEOS
I have made also two more videos showing the time-lapse process of creating the mandala structure and drawing a mandala using this structure, check it out!

FREE DOWNLOAD
This tutorial is a test but I want to make much more, so if you like it please appreciate and share!
Criticizes and suggestions are very welcome, to have acess to the files used in this tutorial click at this mediafire link
Thank you for whatching and appreciate <3
Criticizes and suggestions are very welcome, to have acess to the files used in this tutorial click at this mediafire link
Thank you for whatching and appreciate <3


