How Things Work - Foosball Table
1st September, 2014
1st September, 2014
So, DesignEarth has ended and I'm not looking forward to my next course. However on the first day of class, We were told that by the end of the course, we are expected to make one object which uses mechanical movement and has a source of power, this source can be a battery, a motor, or human power. Although I usually don't like this course where you can just make anything on your own and don't get to learn much from others, I decided to make the most of the opportunity and make something that I've been planning for a while; a foosball table.
A good, Tornado foosball table starts at $1,000USD. I think that is outrages. I did some research and saw that I could make my own for about 10,000Rs, or $200USD. I started planning and seeing table regulation sizes, measuring everything and decided that add ons that I can install. I decided on many things and have even bought the wood. I have gotten a good budget and will be making this with help from Aadithiya Kota. For making it regulation size, I have taken everything from the International Table Soccer Federation (ITSF).
- Average weight: 200 Pounds.
- Average length: 56 inches.
- Average width: 30 inches.
- Average height: 36 inches.
- Play field size: 48 inches x 27 inches.
- Play field depth: 4.25 inches.
- Average thickness of side walls: 1.5 inches.
- Average thickness of back walls: 3.75 inches.
- Size of the goal: 8.375 inches x 3 inches.
- Spacing between the rods: 6 inches apart from the center.
- Height of rods: 3.125 inches.
- Spacing between back wall and goalie rod: 3 inches.
I have also found a place in Bangalore which delivers spare foosball parts so now I can make it completely regulation and proper. The selling price for this table could be between 30-80k Rs depending on the wood and how many I make. The first one will be for keeps, but I hope to put the design out for custom orders so I can finance future projects.
So, while I was working on my sketches, I got stuck so I decided to make a scale model to make it easier for myself. I had a lot of laminate lying around in the house from the house owner, so I used that and some cardboard as a base underneath to hold the structure.
I always like to make a model for everything as soon as I have the design in my head because for me I find it easier to make the model and then figure out how the sketch will look. So, I made some rough sketches and then made the model and then my final sketches.

Initial Sketches

Parts and Accessories

Small Scale Model
I used toothpicks for the rods, drilled the holes out with a Bosh drill. Made the triangular frame and added the smaller triangular supports after calculating all of the scale lengths. I put a black covered laminate to distinguish the playing field from the table.
I have planned out a lot of features and accessories for this table as well. I, with the help of Aadithiya Kota will install stadium like floodlights on the four corners ( Led Strips) and will also put lights underneath the board on top of the goals as backlight. We will also get a Arduino to route all of these wires through so they can be designed to go off whenever there is a goal with a sensor. The lights will be timed to turn back on once the ball rolls out to the retrieval hole. There will be 2 built in cup holders on the side frames, and a removable ashtray on top. The scoreboard will be made out of a metal rod and 10 cuts of cane on each side to represent the score. Other than these 'must parts', we also hope to add a side table attached with a hinge on one side, a motor that can bring the ball all the way back on to the table,
Other than that, I plan to completely sand it properly, and then polish it with some good wood oils for finish and strength.

Cutting - Jigsaw

Sanding - Orbital Sander

Polishing - Linseed Oil
Once it looked the way I wanted, with all of those grains popping out; and feeling completely smooth like veneer sheets, I cleaned up all of the saw dust and then laid out all of the pieces on newspaper for oiling and polishing.
I went out that morning and bought 2 bottles of linseed oil and some other types of oil that I could find. I tried them all out on a waste block. The linseed oil gave the most vivid finish, just what I wanted. I did a lot of research before applying the oil as last time I tried with varnish and got a really plasticky, sticky coat.
I took small pieces of crape bandage as the cloth used to rub the oil in to the wood. I found many tips and tricks online so I noted them down cause they were really important.
I took small pieces of crape bandage as the cloth used to rub the oil in to the wood. I found many tips and tricks online so I noted them down cause they were really important.
- Thinnest coat possible
- Let sit for 20 minutes then wipe ALL of the excess off
- Drying time is about 12 hours for thin coat
- Need about 3 - 5 coats
- Make sure it's spread evenly
After the first coat was just applied, the wood looked beautiful. Now that is has dried the color is faded a bit as the wood as absorbed the oil. This is the reason why many coats are needed. The same process was done in the next 2 days for the second and third coats.

Construction

Wood Turning - Lathe

Handles - Wood Turning - Lathe
I cut out 4 blocks of equal size from a huge block I had found around the workshop. I started putting them into the lathe machine one at a time. I made the 2 diagonals one both sides to mark the center, And fit it into the teeth of the lathe machine. I then started adjusting the lathe so that I could get the handle shape. Since all the blocks were the same size, I could use the same measurements on the lathe every time and get them equal. The lathe machine is an amazing machine. You just keep digging into the spinning wood 10 points at a time until you get the shape you want. The blade slides both horizontally and length wise to get the desired curve.
I did 300 points on each block to get the diameter right, about 2 cm. Then I curved the edges to give them a more soft feel and comfortable touch. Then I took off more wood around the middle in steps to get the design I wanted, It also adds grip.
I did 300 points on each block to get the diameter right, about 2 cm. Then I curved the edges to give them a more soft feel and comfortable touch. Then I took off more wood around the middle in steps to get the design I wanted, It also adds grip.
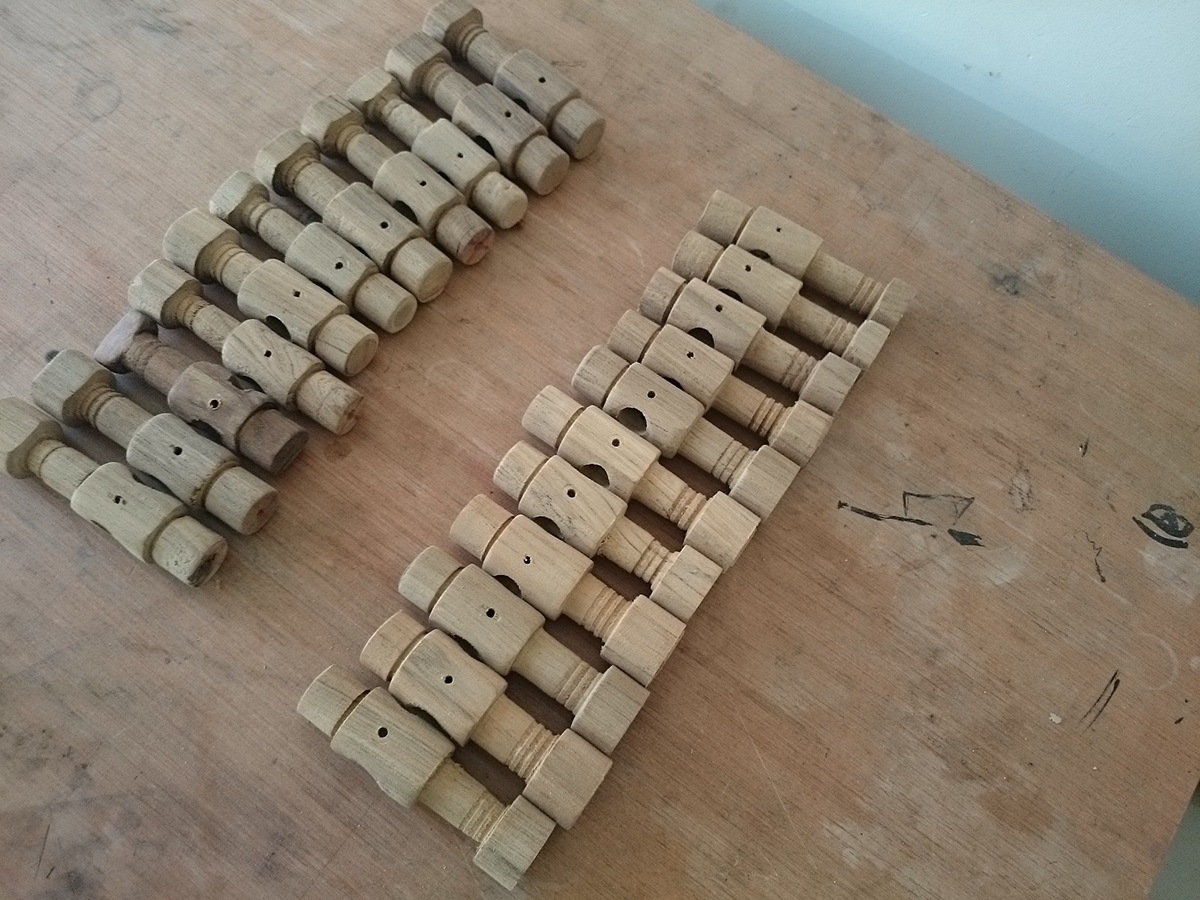
22 Players - Wood Turning - Lathe
Same with the players, but with the sape above.


The Complete Table
The field was stunning. A lot of dirt and grease had covered the plastic in all this time so when we took it off, it really made a difference. The players were also contrasting beautifully. We gave it a final cleaning, and it was alive. It looked amazing. It was finally done.

Game Time!
This has been an amazing experience. I have learned so much. Through all of the trial and error, I learned so much about plywood, wood timber, MDF, and Adruinos. I also learned about so many machines and tools and techniques that I can use and my range has become so much bigger.
I feel like so many possibilities have opened up for me thanks to all that I have learned!
I feel like so many possibilities have opened up for me thanks to all that I have learned!

